A checklist is a simple tool that helps you organize tasks, track progress, or make sure you haven’t missed anything important. Whether it’s for a presentation, project planning, or even a daily to-do list, checklists can keep things clear and easy to manage. They’re useful in classrooms, workplaces, and personal life, helping you stay on top of tasks and goals.
In this blog, we’ll walk you through how to create a checklist in PowerPoint. You’ll learn how to design a checklist that fits your needs, whether it’s for a professional presentation or a personal project. PowerPoint makes it easy to create visually appealing checklists that you can customize however you like. Let’s get started!
How to Create a Checklist in PowerPoint?
Method 1: Manually Create CheckBox
Here’s a step-by-step guide to manually create an interactive checkbox in your PowerPoint presentation:
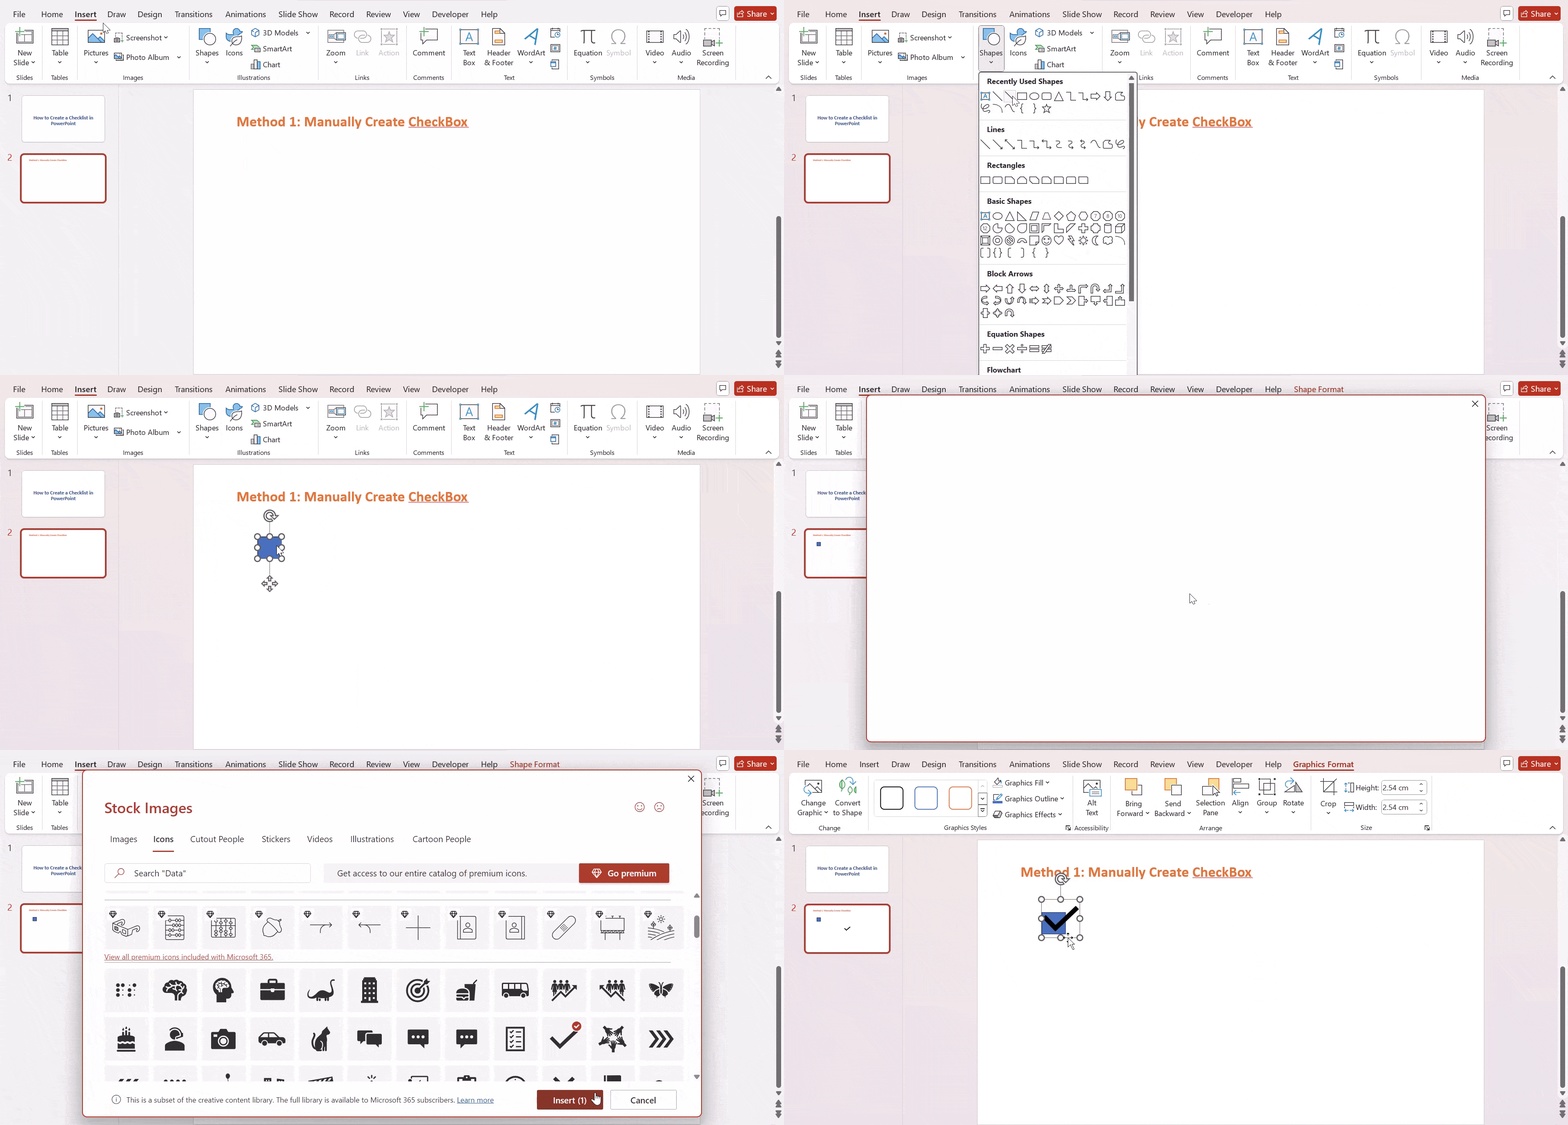
Step 1: Create the Checkbox Shape:
- Open your PowerPoint presentation.
- Go to the Insert tab.
- Click Shapes and choose a Rectangle shape.
- Draw a small square on your slide. This will be your checkbox.
Step 2: Insert the Checkmark Icon:
- Go to the Insert tab again.
- Click Icons and select a checkmark icon you like.
- Place the checkmark icon on your slide, slightly off to the side of the checkbox.
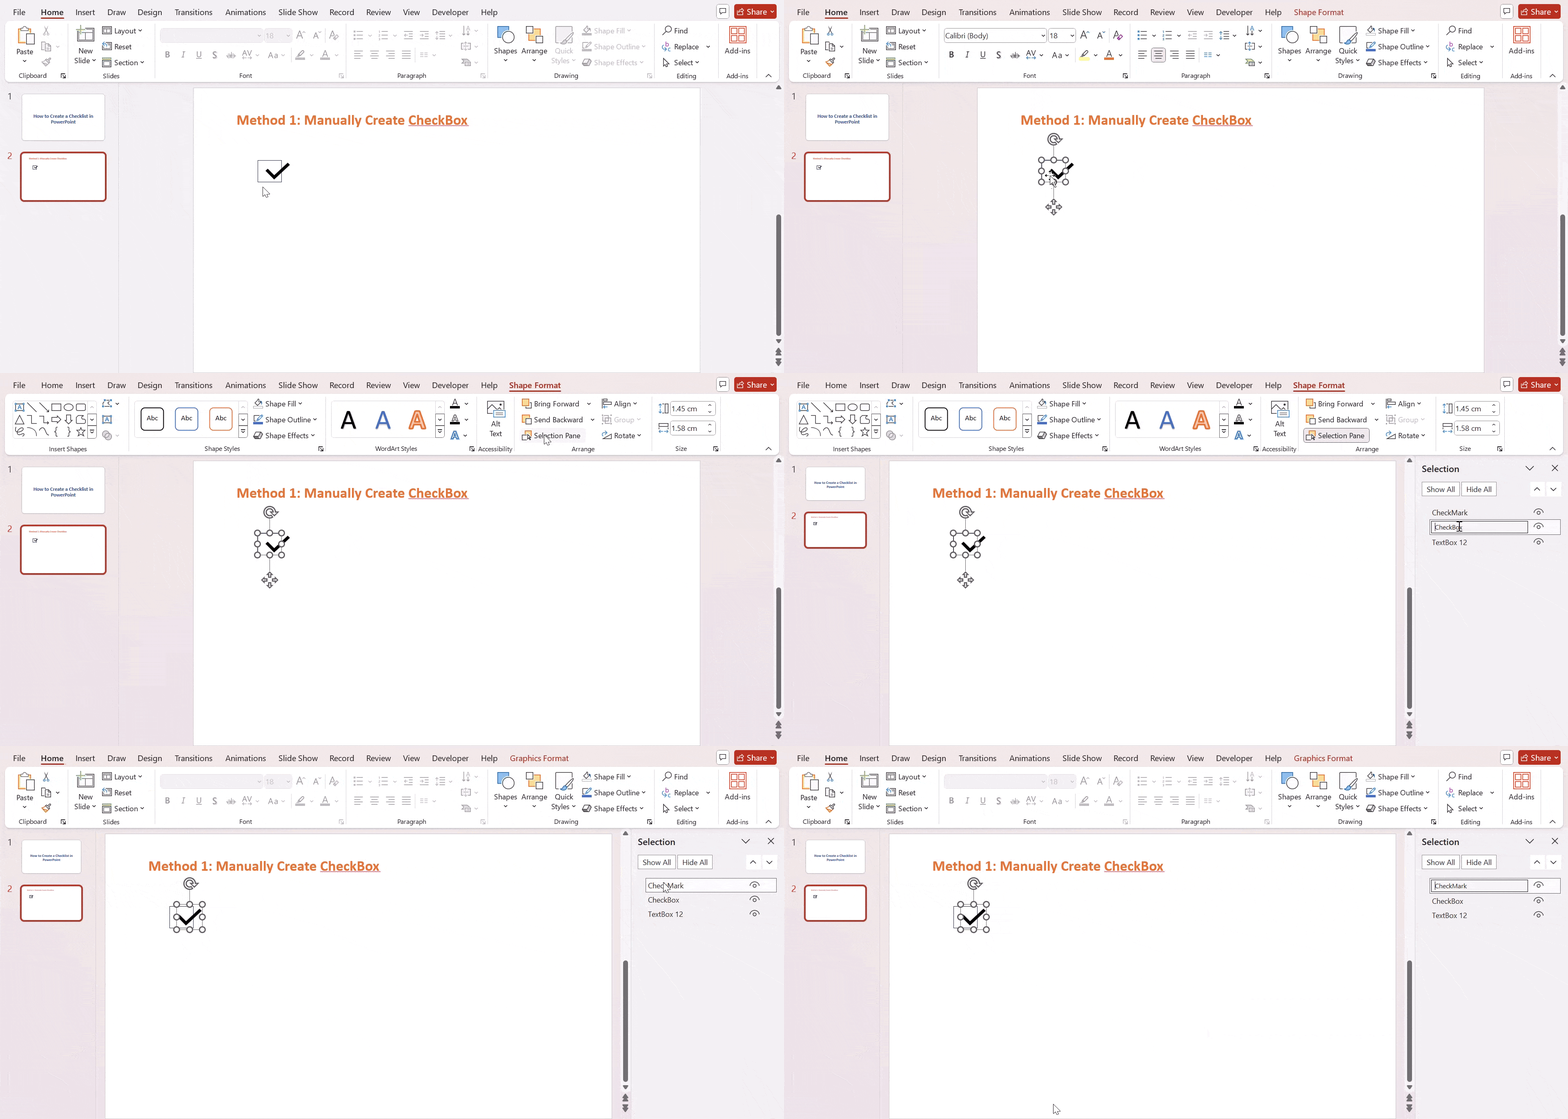
Step 3: Organize the Elements:
- Go to the Format tab.
- Click Selection Pane.
- Rename the rectangle and the checkmark icon to something easy to remember (like “Checkbox” and “Checkmark”). This will help you manage them later.
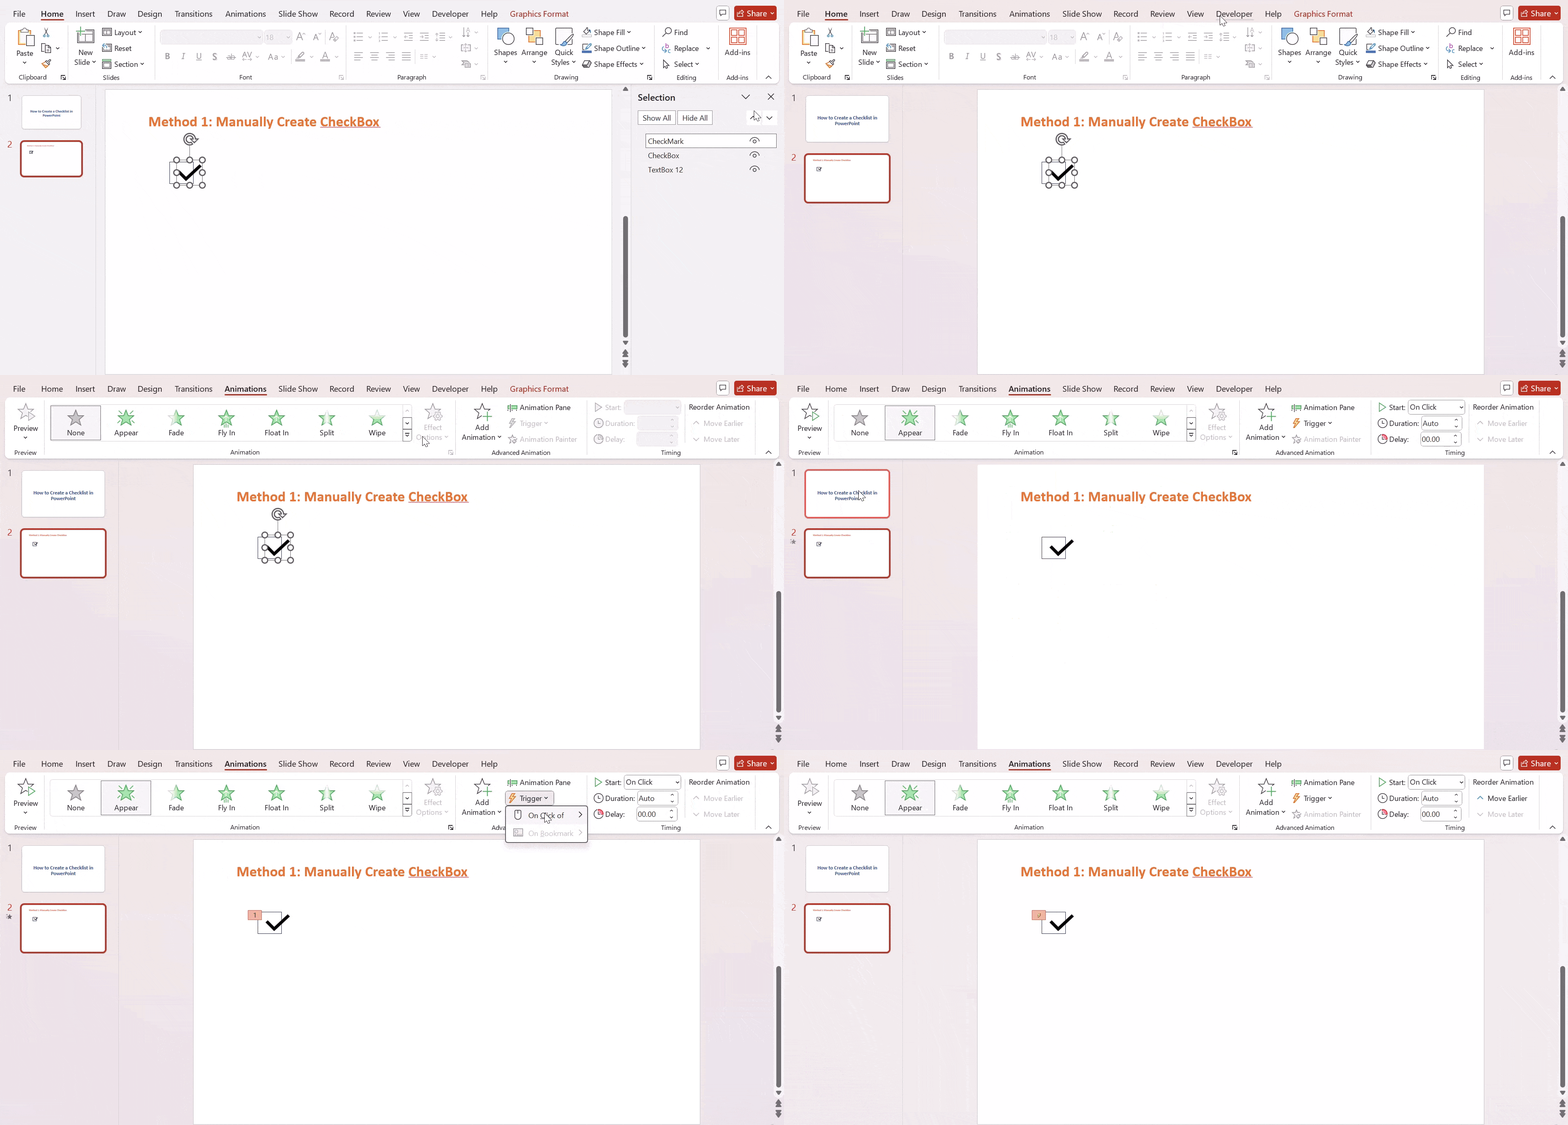
Step 4: Set Up the Checkmark Animation:
- Make the Checkmark Appear: Select the checkmark icon.
- Go to the Animations tab.
- Click Add Animation and choose Appear.
- Trigger the Appearance: Right-click the checkmark animation and select Timing.
- Click Trigger and choose On Click of.
- Select the rectangle (checkbox) shape.
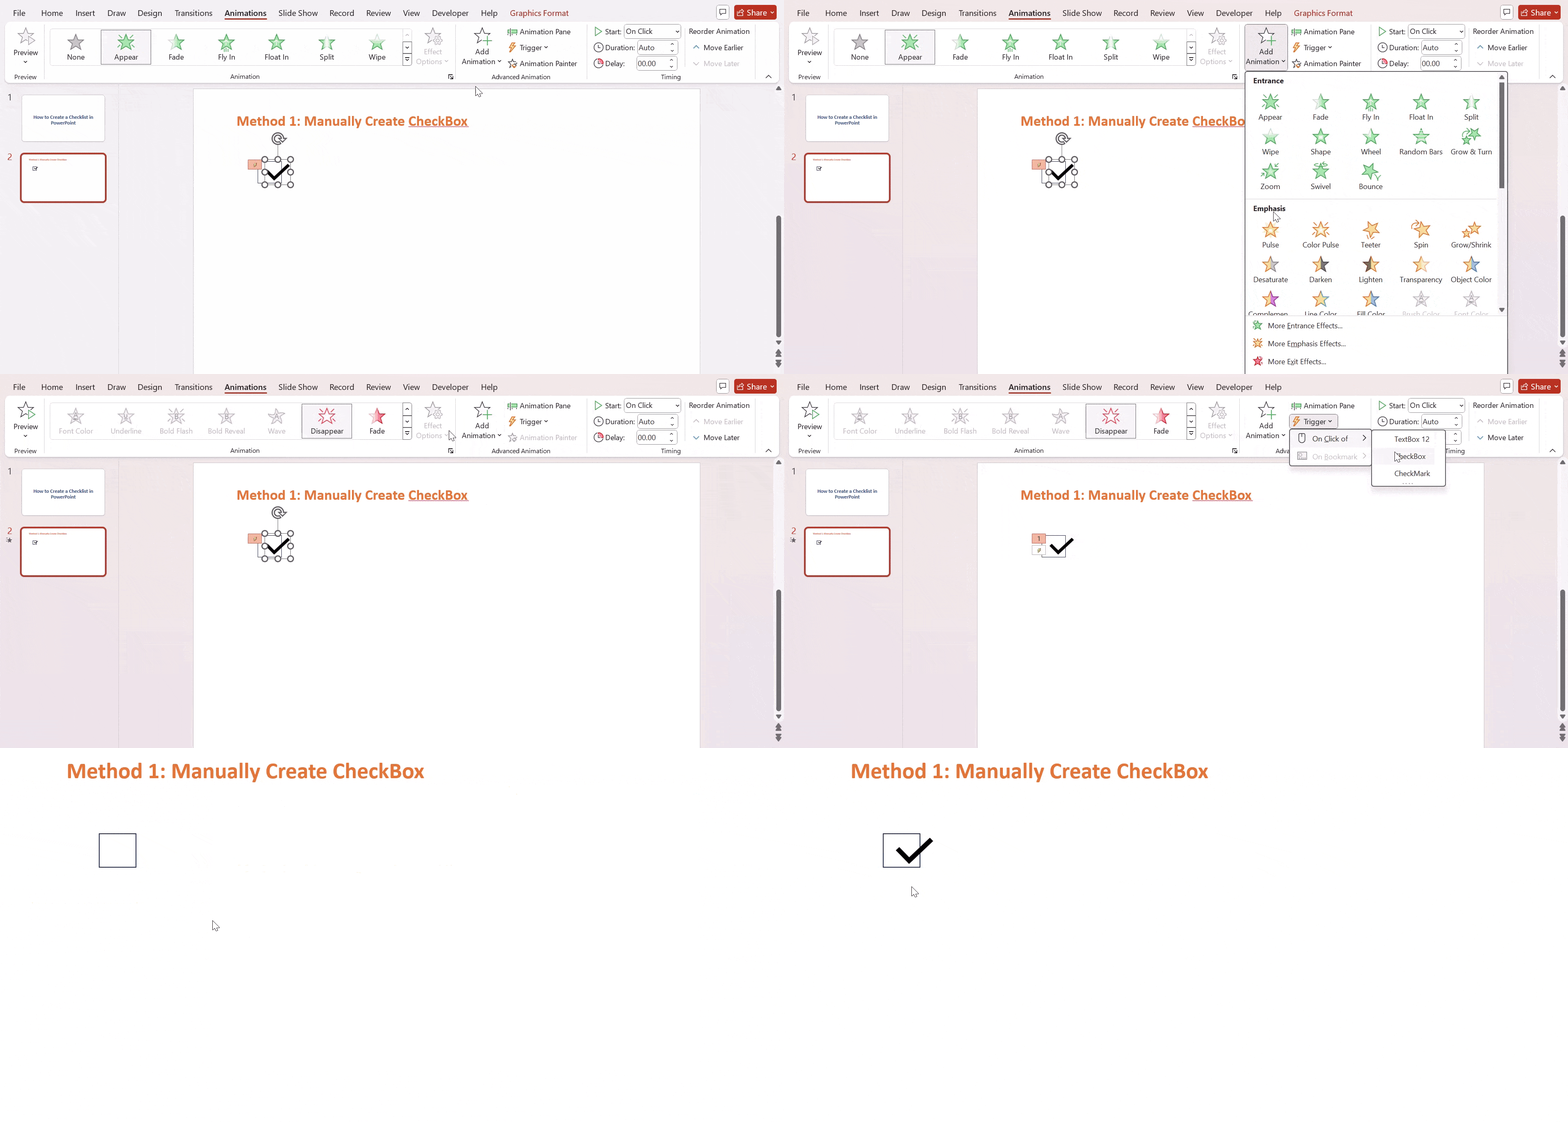
Step 5: Set Up the Checkmark Disappearance:
- Make the Checkmark Disappear: Select the checkmark icon again.
- Go to the Animations tab.
- Click Add Animation and choose Disappear.
- Trigger the Disappearance: Right-click the disappear animation and select Timing.
- Click Trigger and choose On Click of.
- Select the rectangle (checkbox) shape once more.
Step 6: Add Text for Your Checklist:
- Insert a Text Box next to each checkbox.
- Type the checklist item in the text box.
Now, when you present your slide, clicking on the checkbox will make the checkmark appear or disappear, simulating a real checkbox.
<SlidesAICTA4 />
Method 2: Create a checklist using SmartArt Option
Step 1: Prepare Your Checklist:
- Open your PowerPoint presentation.
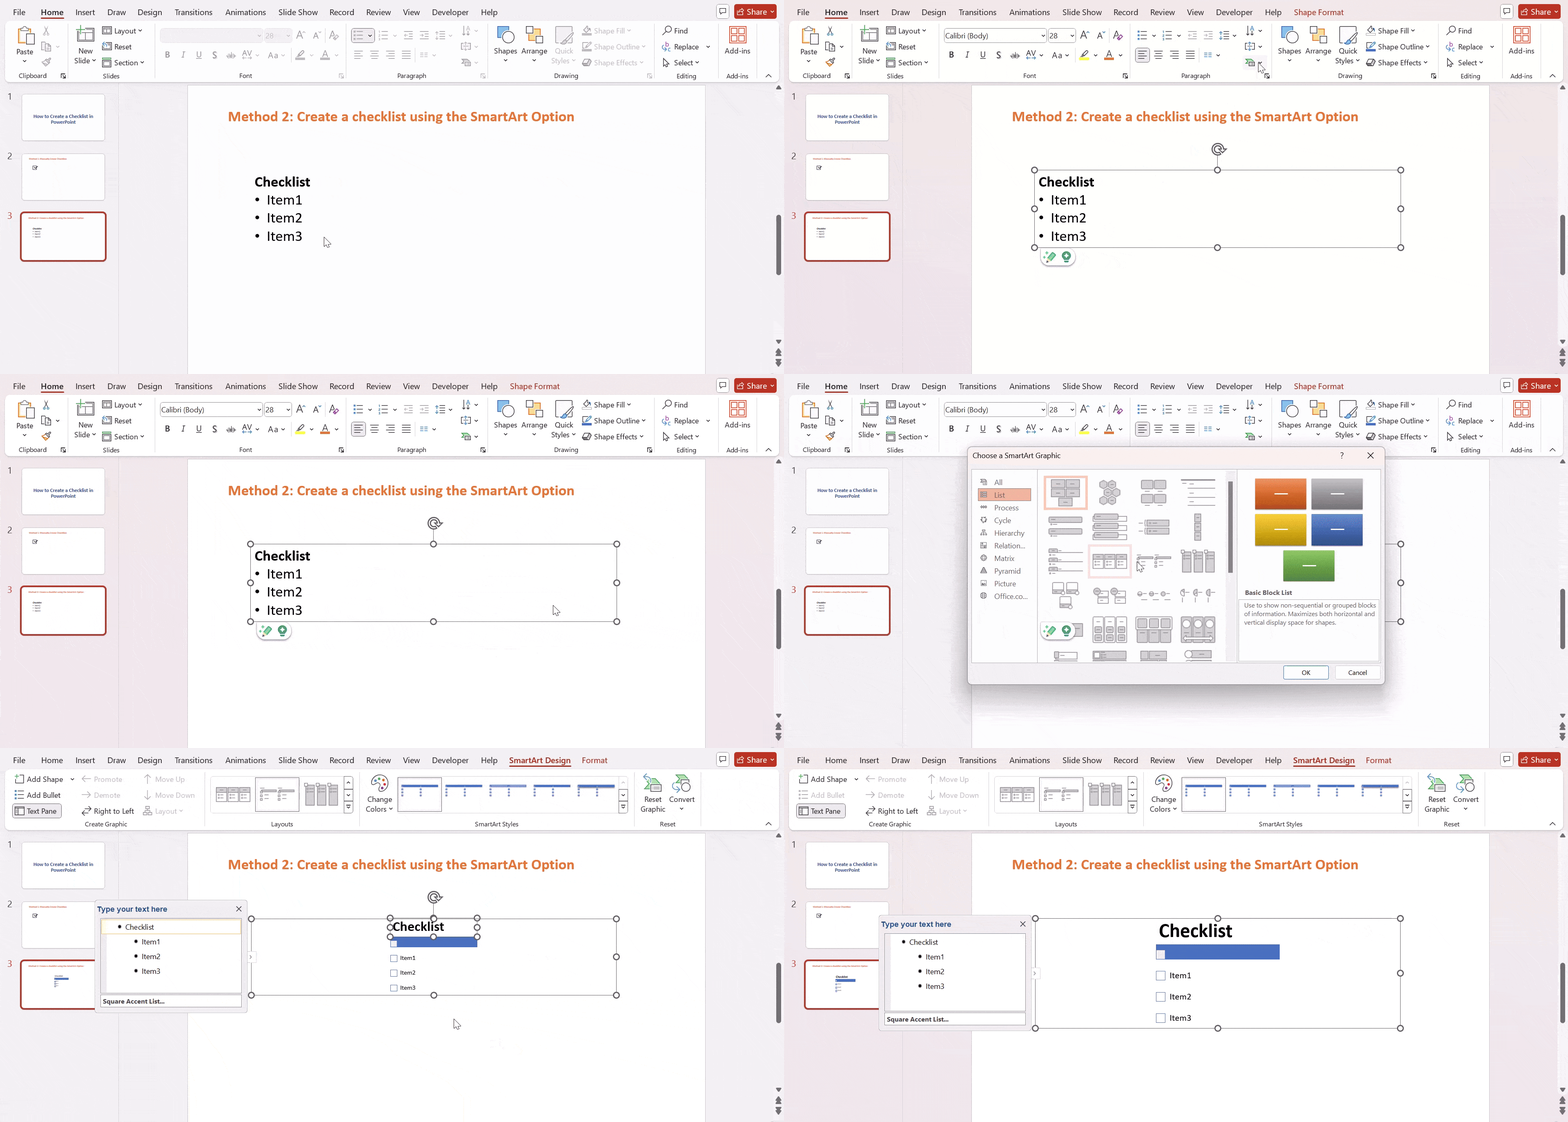
- Type out your checklist items, including a title for your list.
- Format your list items as bullet points to ensure they’re easily identifiable.
Step 2: Highlight Your List:
- Select all the text in your checklist, from the title to the last list item.
Step 3: Convert to SmartArt:
- Go to the Home tab on the PowerPoint ribbon.
- In the Paragraph group, click the Convert to SmartArt button.
Step 4: Choose the SmartArt Graphic:
- A new window will open.
- Navigate to More SmartArt Graphics.
- Select the List category.
- Choose the Square Accent List option.
Step 5: Customize Your Checklist:
- Your checklist will now be transformed into a visually appealing SmartArt graphic.
- You can further customize it by:
- Changing the colors and fonts.
- Adjusting the size and layout.
- Adding effects like shadows or glows.
Note: Follow the steps outlined in Method 1 to enhance the checklist’s engagement.
Method 3: Using symbols and text
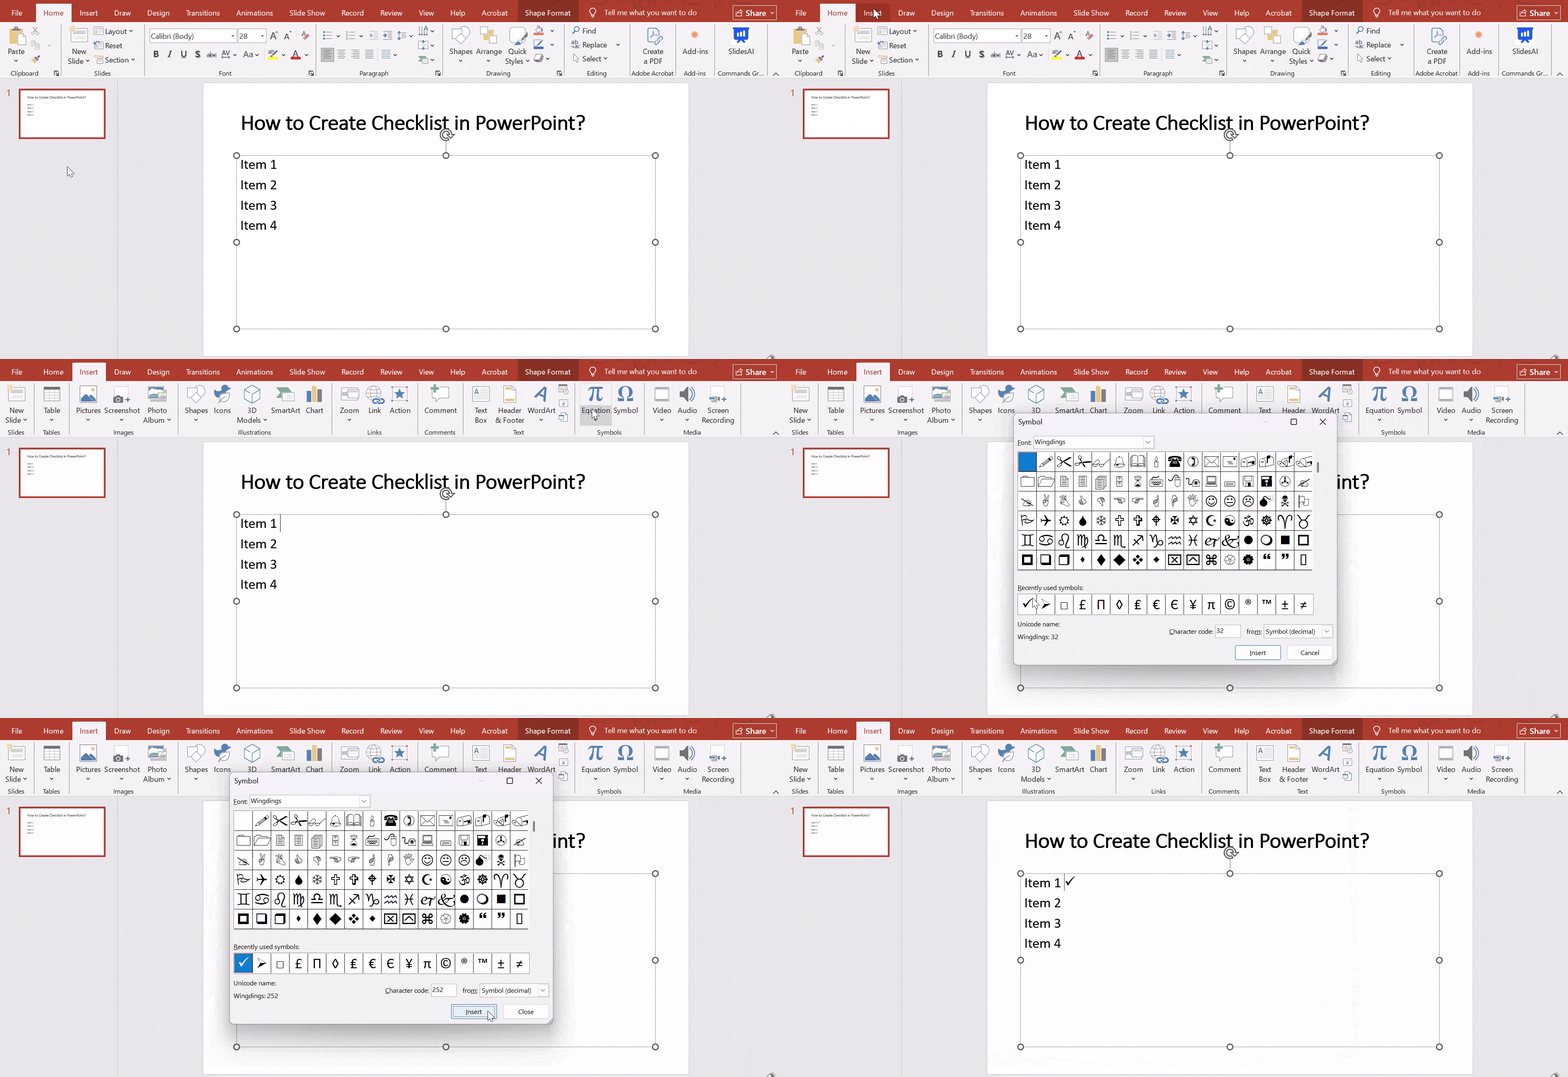
Step 1: Add your list items using a text box or a bulleted list on your slide.
Step 2: Insert a checkmark symbol by going to the Insert tab, selecting Symbol, and choosing your preferred checkmark.
Step 3: Copy and paste the checkmark symbol for each item on your list.
Step 4: Customize the list by adjusting the size, color, and spacing of the symbols to match your slide’s design.
<SlidesAICTA5 />
Closing Thoughts
Creating a checklist in PowerPoint is easier than you might think, whether you’re going for a basic design or something more polished. With just a few steps, you can make a customized list that’s interactive, visually appealing, and tailored to your needs. Give it a try and see how it can keep your tasks organized and on point!
Also Read – How to Make an Interactive PowerPoint Presentation?
Frequently Asked Questions About PowerPoint Checklist
How can I add checkboxes in PowerPoint?
To add checkboxes in PowerPoint, you’ll need to enable the Developer tab first. Here’s how:
- Go to File > Options > Customize Ribbon and check the box for Developer to add it to your ribbon.
- Once the Developer tab is active, click on it and select the checkbox option.
- Click and drag on the slide to place the checkbox wherever you need it.
Can I copy checklists between PowerPoint presentations?
Yes, you can copy and paste checklists from one PowerPoint presentation to another. Just use the standard copy-paste options. However, make sure any formatting or animations applied to the checklist transfer correctly. Sometimes, you may need to adjust them manually after pasting to ensure everything looks and works as intended.
How do I make interactive checkboxes in PowerPoint?
Use shapes and animations: insert a rectangle for a checkbox, place a checkmark icon, and set an animation to appear on click.
Is it possible to check/uncheck items during a slideshow?
Yes. By using shapes and animations (Method 1), you can make checkmarks appear or disappear when clicked in slideshow mode.
Can I make a checklist with images instead of symbols?
Yes. You can insert small icons or pictures as checkmarks for a more visual or branded checklist.
Can I add hyperlinks to checklist items?
Yes. Select the text or checkmark, right-click → Hyperlink, and link to another slide, document, or webpage.
Can I use icons from other sources for checkmarks?
Yes. PowerPoint supports inserting icons, SVGs, or images from external sources. Ensure they are free for use or properly licensed.
Can I copy a checklist from Word to PowerPoint?
Absolutely. Copy the list from Word and paste it into a text box. You may need to adjust the formatting or add symbols manually.


