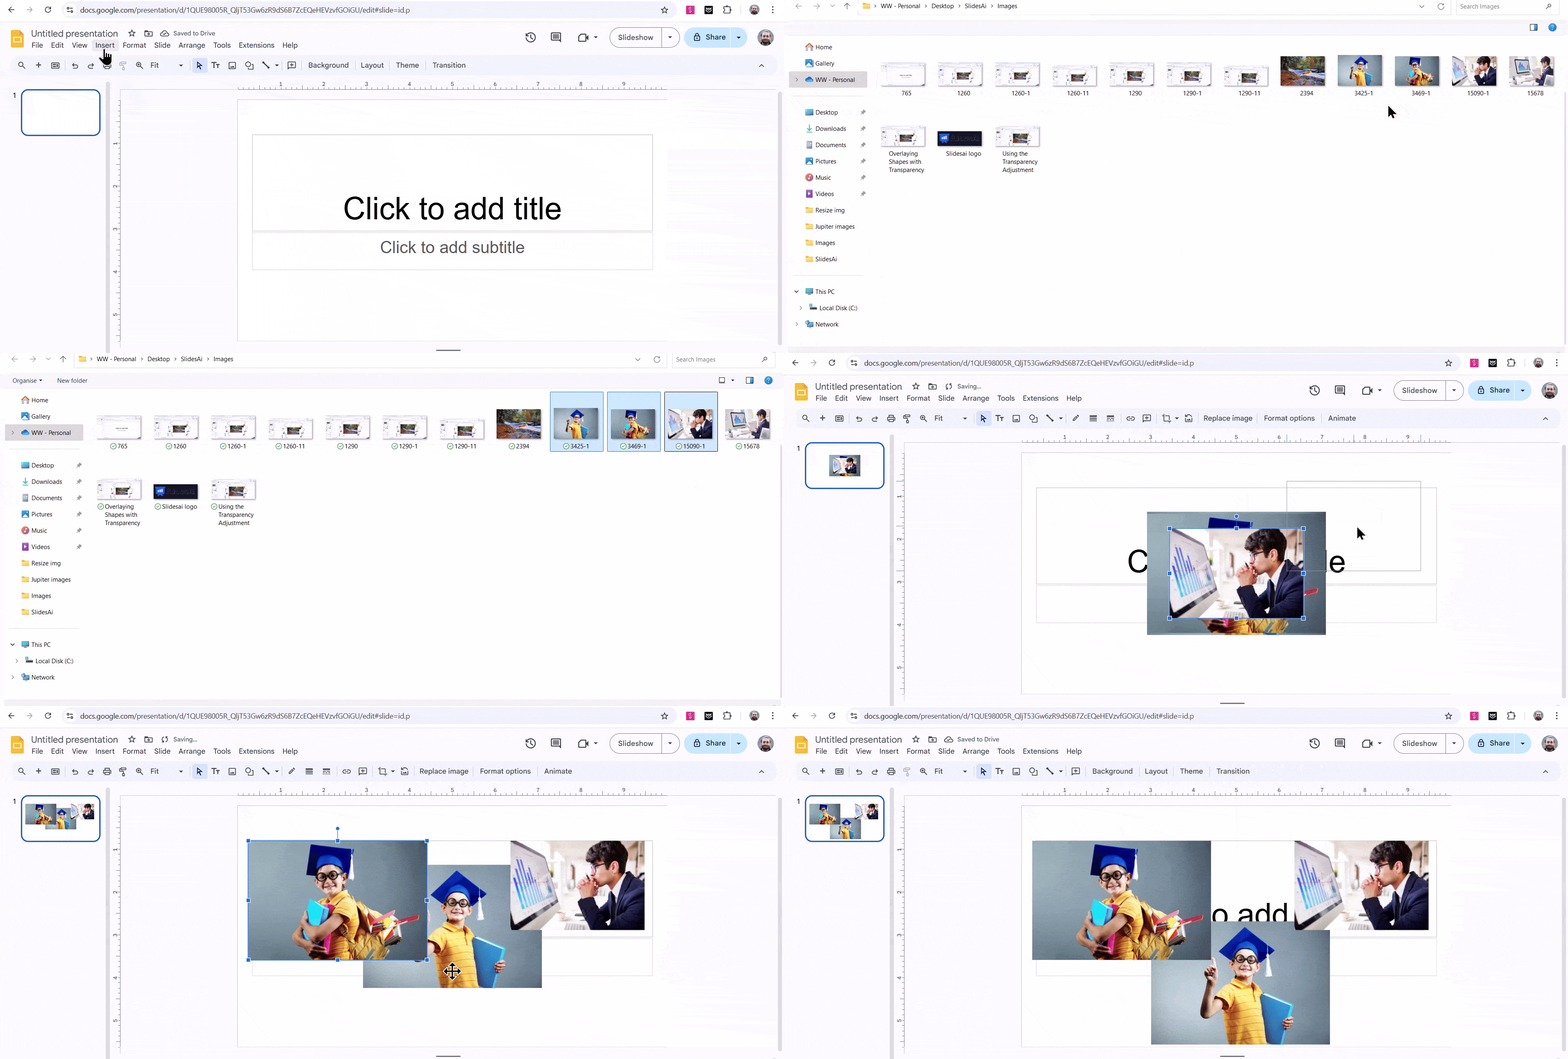
Google Slides is a great tool for creating presentations, whether it’s for work, school, or any other purpose. It gives you plenty of options to showcase your information in a way that grabs attention. One of these options is the photo collage feature, which lets you put multiple images on one slide in a creative and fun way.
In this blog, we’ll walk you through the process of making a photo collage in Google Slides. Let’s dive in and get started!
How to Make a Collage on Google Slides?
Making a collage on Google Slides is a fun and simple process. Here’s how you can do it:
- Step 1: Start with a blank presentation: Begin by opening a new presentation in Google Slides. You can use a blank slide as your base, but if you want something more creative, you can find and download some cool templates from our website.
- Step 2: Add your images: To add pictures, look at the top menu and click on “Insert.” This will open a list of options.
- Step 3: Choose ‘Image’: From the list, select “Image.” You’ll then be given a few options for where you can upload your pictures from. You can pick from places like Google Photos, Google Drive, your computer, or even search Google Images directly.
- Step 4: Upload your pictures: After selecting your images, they’ll show up on your slide.
- Step 5: Move and resize your images: You can click and drag the images to place them where you want on the slide. If you need to make them bigger or smaller, just click on the corner of the image and adjust the size.

For extra touches, like adding shapes, rotating the images, or changing colors, you can use the “Format” option in the menu bar to customize your collage further.
<SlidesAICTA1 />
Closing Thoughts
Creating a collage on Google Slides is a fun and easy way to showcase your images. With a few simple steps, you can turn a blank slide into a creative masterpiece. Whether for work, personal projects, or even thoughtful photo collage gift ideas, it’s a great tool to make your presentations stand out. Enjoy experimenting with different layouts and designs!
For even more dynamic and efficient presentations, consider leveraging an AI presentation maker to enhance your visual storytelling.
Frequently Asked Questions Related to Making a Collage on Google Slides
How do I layer images in a collage on Google Slides?
To layer images in your collage, right-click on the image you want to adjust, then go to the “Order” option. From there, you can choose whether you want to send the image to the back or bring it to the front, depending on where you want it to appear in relation to other images.
Can I add text to my Google Slides collage?
Yes, you can easily add text to your collage. Just click on “Insert” in the menu, then select “Text box.” Once the text box appears, type in your message and move it to any spot on your slide that looks best.
Is it possible to add borders or effects to images in my collage?
Absolutely! To add a border, click on the image, then use the Border weight tool on the toolbar to adjust the thickness of the border. You can also change its color using the Border color tool to match your design.
Can I share my Google Slides collage with others?
Yes, sharing your collage is simple. Click the “Share” button at the top-right of the screen, and you’ll have the option to either generate a shareable link or invite specific people via email. You can choose whether they can just view or also edit the slide.


