
Want to take your Google Slides presentations to the next level? Instead of sticking to basic rectangular images, why not add a creative twist by cropping your pictures into custom shapes? Whether it’s a heart, star, or even a circle, transforming your images into unique shapes can give your slides a fresh, professional look.
In this guide, we’ll show you just how easy it is to crop images into custom shapes in Google Slides, making your presentations stand out with minimal effort! Without waiting further, let’s get started.
How to Insert an Image Into a Shape in Google Slides?
Want to turn your image into a custom shape for your presentation? It’s a fun and easy way to add a creative touch to your slides. Here’s how you can do it in a few simple steps:
<SlidesAICTA1 />
Method 1: Add a Custom-Shaped Image to Google Slides
Step 1: Get the Shape You Need
First things first, you’ll need the shape you want the image to fit into. You can either create your own custom shape or find one online, but make sure it’s saved in the .png format for best results.
Step 2: Choose Your Image
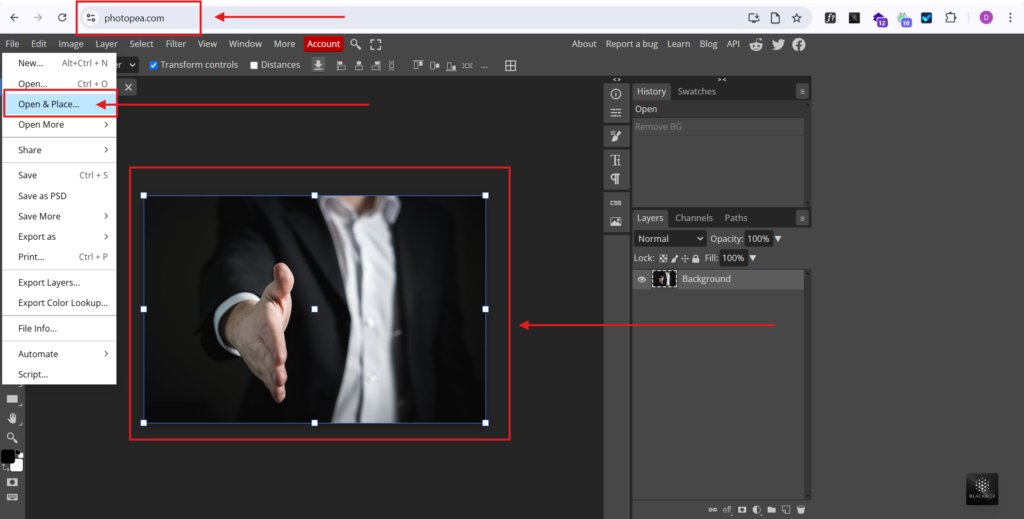
For this example, let’s say you want to add an image over a pentagon. Open up Photoshop or head over to Photopea.com (a free online alternative). Once you’re in Photopea, click on “Open from Computer” to upload your image file.
Step 3: Overlay the Image on the Shape
Now that your image is open, head over to the File menu and choose “Open & Place.” This will let you place the image directly onto the shape you’ve selected. You can adjust its position later.
Step 4: Position the Layers
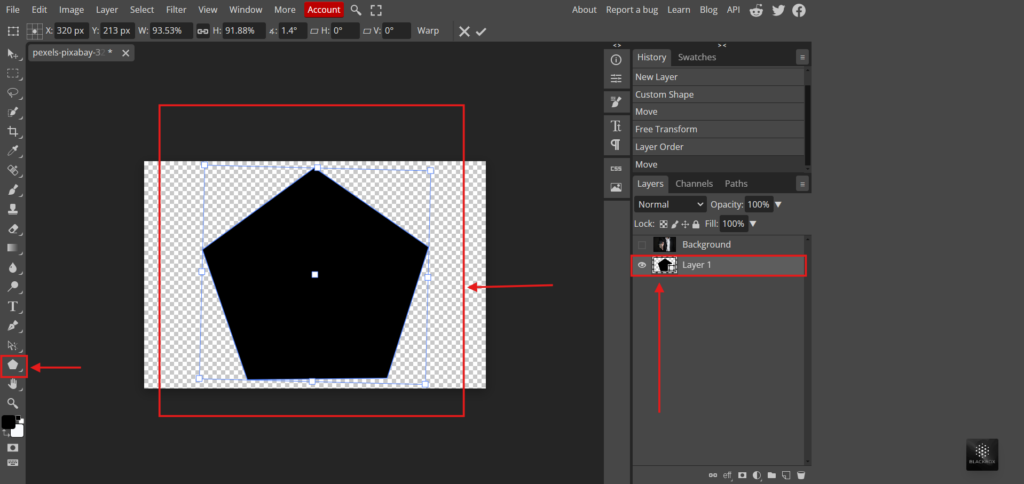
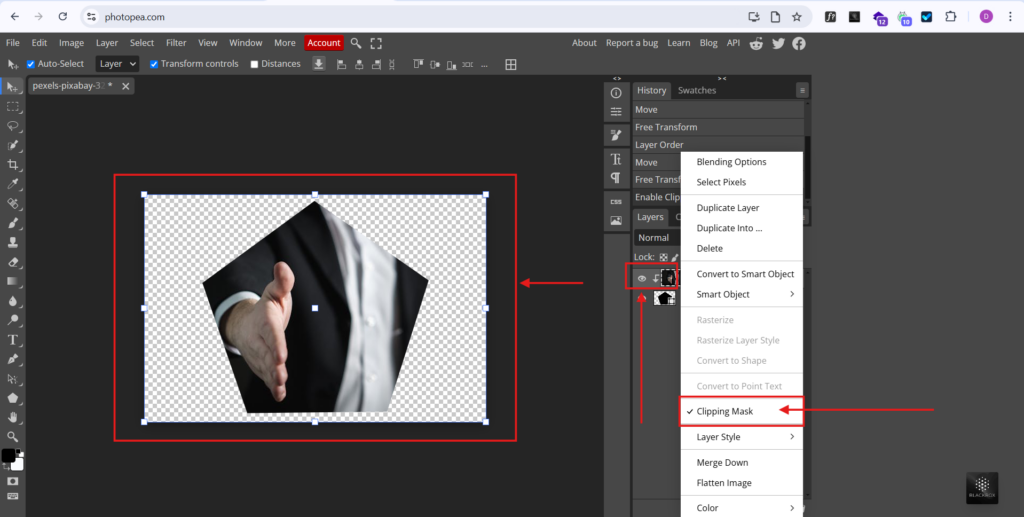
To make sure everything lines up, take a look at the Layers panel on the right side. Make sure your image layer is above the shape layer. If it’s not, simply drag the image layer to the top. Then, right-click on the image layer and select “Create Clipping Mask.” This will crop the image into the shape.
Step 5: Adjust the Image
Press “V” on your keyboard (or click the Move Tool from the left toolbar). You’ll see the “Transform Controls” option in the top menu. Check this box to resize or reposition your image to fit just right inside the shape. Play around with the adjustments until you’re happy with how it looks.
Step 6: Export the Custom Shape
Once you’re done tweaking the image, go to the File menu and select “Export As” > “PNG.” Save it to your computer so you can use it later.
Step 7: Insert the Image into Google Slides
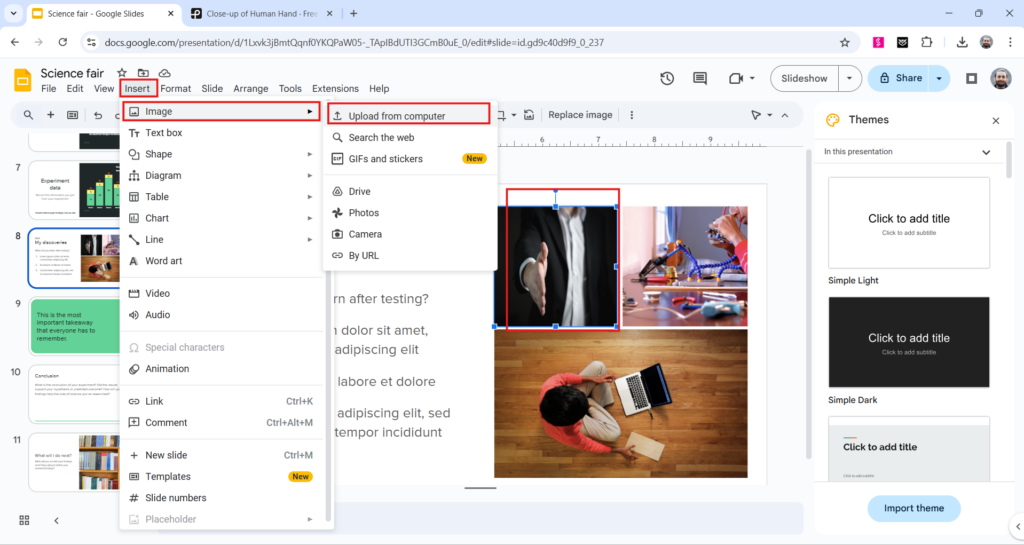
To add your custom-shaped image to Google Slides, open your presentation, go to the Insert menu, and select “Image” > “Upload From Computer.” Find your image file and add it to your slide. Now, you have a perfectly shaped image to wow your audience!
<SlidesAICTA2 />
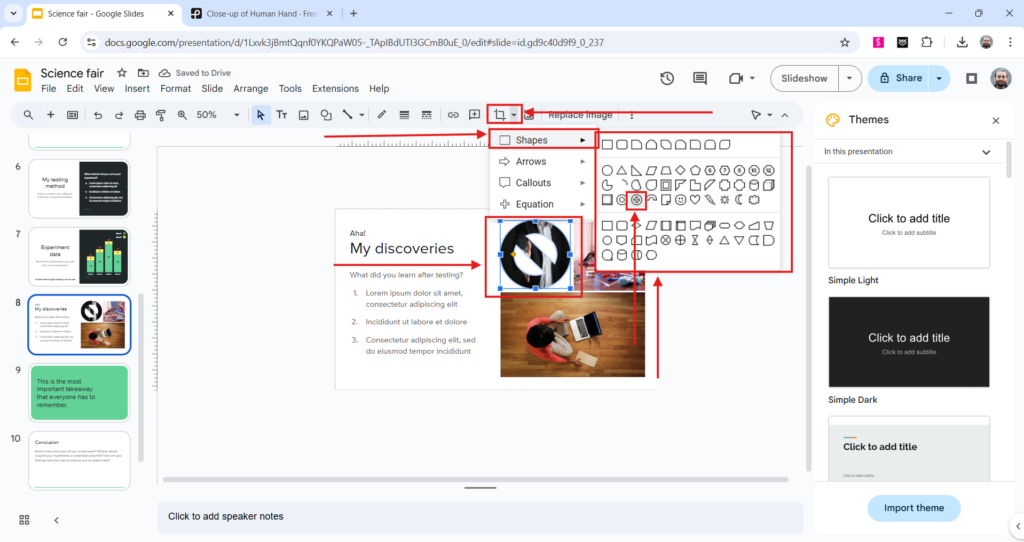
Method 2: From Google Slides Cropping Tool
Step 1: Open Your Google Slides Presentation
First, open the Google Slides presentation where you want to shape your image. If you haven’t started one yet, go ahead and create a new slide deck.
Step 2: Insert an Image
Pick the slide where you want to add the image. From the top menu, click on “Insert,” then choose “Image.” You can upload the image from your computer, Google Drive, or even find one online.
Step 3: Select the Image
Once your image is in place, click on it to select it. This will bring up the “Format options” sidebar on the right side of the screen.
Step 4: Open the Image Crop Tool
In the sidebar, find the “Image crop” tool. Click on it, and a drop-down menu will pop up with different options.
Step 5: Pick Your Shape
From the drop-down, pick the shape you want your image to take. There are several shapes to choose from like circles, rectangles, and even arrows.
Step 6: Adjust the Shape
Resize and move the shape around by clicking and dragging its corners. Make sure the shape fits your image just right and matches your slide design.
That’s it! You’ve just transformed an image into a shape in Google Slides.
Closing Thoughts
Now you’re all set to give your presentations a fresh look with custom-shaped images. It’s a simple trick that adds a creative touch without much effort. Whether you’re using custom shapes or the built-in cropping tool, this little hack can make your slides stand out. Have fun experimenting with different shapes!
Elevate your visual content in this powerful online presentation maker and create stunning, unique slides.
Related Posts
-

When making a presentation or a slide, using images is crucial, even in educational settings.…
-

Sometimes, pictures can take up too much space on a slide, making it hard to…
-

Learn how to make a collage on Google Slides with this step-by-step guide. Learn creative…
-

Working with multiple slides at once in Google Slides can save you a lot of…
-
{ “@context”: “https://schema.org”, “@type”: “FAQPage”, “mainEntity”: [{ “@type”: “Question”, “name”: “How can I save an…
Leave a Reply