
If you’re working on a Google Slides presentation and want to add a little extra flair, making an eye symbol might be just what you need. Whether you’re using it for a creative design, highlighting something important, or just making your slides more visually interesting, an eye symbol can really grab attention. But how do you actually make one? Well, there are a few simple ways to do it, and they’re easier than you might think.
In this post, we’ll show you three quick methods to add that eye-catching symbol to your slides without any hassle. Let’s dive in!
Method 1: Adding Eye Symbols through Special Characters
Step 1: Open Your Google Slides Presentation
Bring up Google Slides on your PC and open the presentation where you want to add the eye symbol.
Step 2: Add a Text Box
Head over to the “Insert” menu at the top of your screen and select “Text box.” Click on your slide to create a text box where the eye symbol will go.
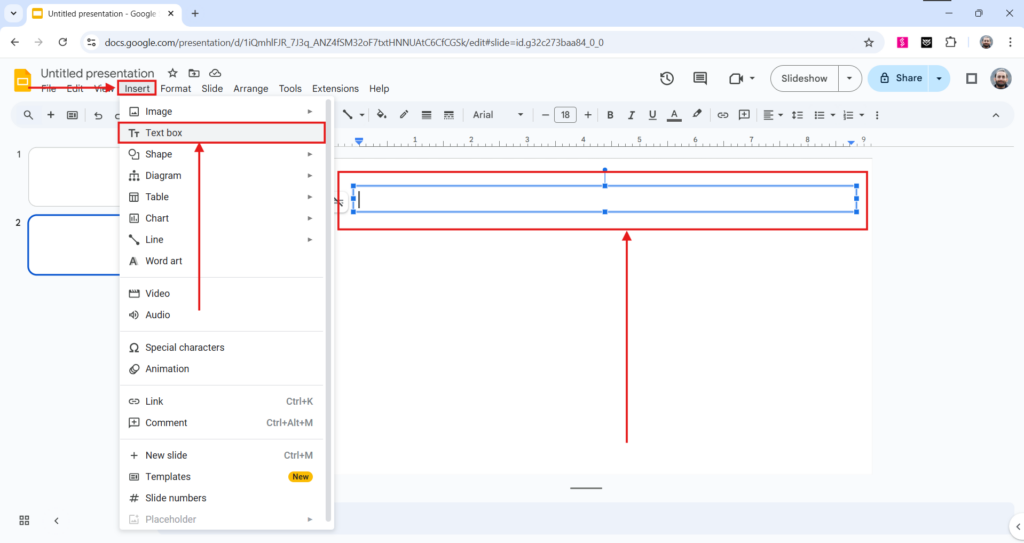
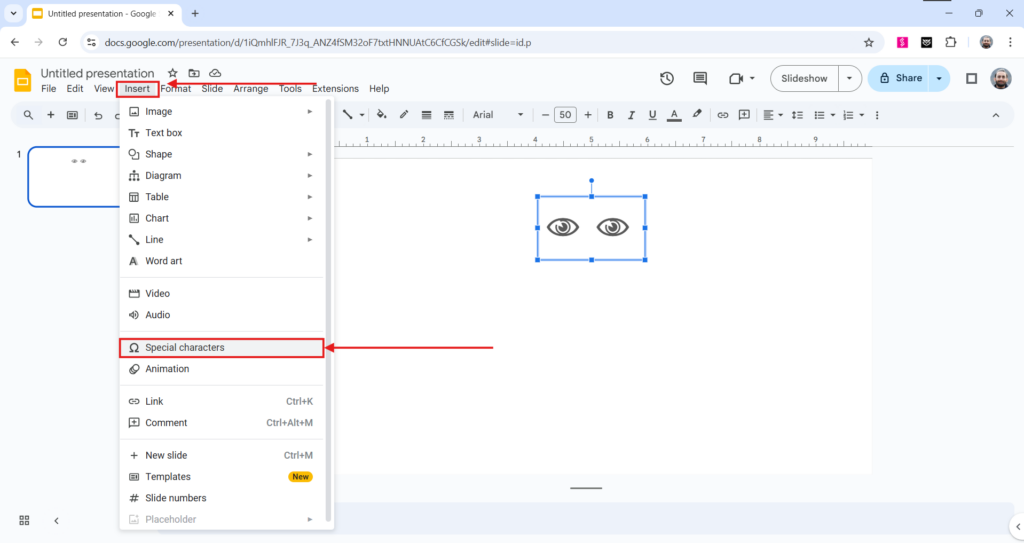
Step 3: Open the Special Characters Menu
Now, click inside the text box you just created. Then, go back to the “Insert” menu and choose “Special characters.” This will open up a special panel where you can pick from all sorts of symbols.
Step 4: Search for the Eye Symbol
In the search bar at the top of the special characters panel, type “eye” and you’ll see the eye symbol pop up. If you don’t see it right away, browse through the categories or emojis until you find it.
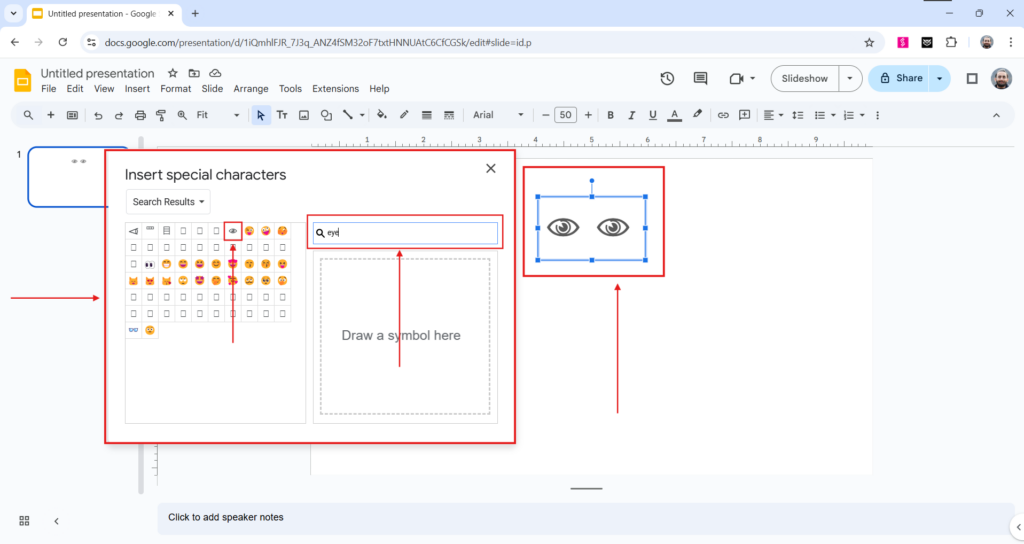
Step 5: Add the Symbol to Your Slide
Once you’ve found the eye symbol you want, simply click on it. It will automatically appear in your text box on the slide.
Step 6: Resize and Move the Symbol
To make the symbol the right size, just click on the text box and use the handles to resize it. You can also drag the symbol around to position it exactly where you want it on the slide.
Step 7: Customize the Symbol (Optional)
If you want to jazz up the eye symbol, you can change the font size, color, or style. Use the formatting tools in the toolbar to make it fit your slide’s theme. Play around with it until it looks just right!
<SlidesAICTA1 />
Method 2: Inserting an Eye Icon
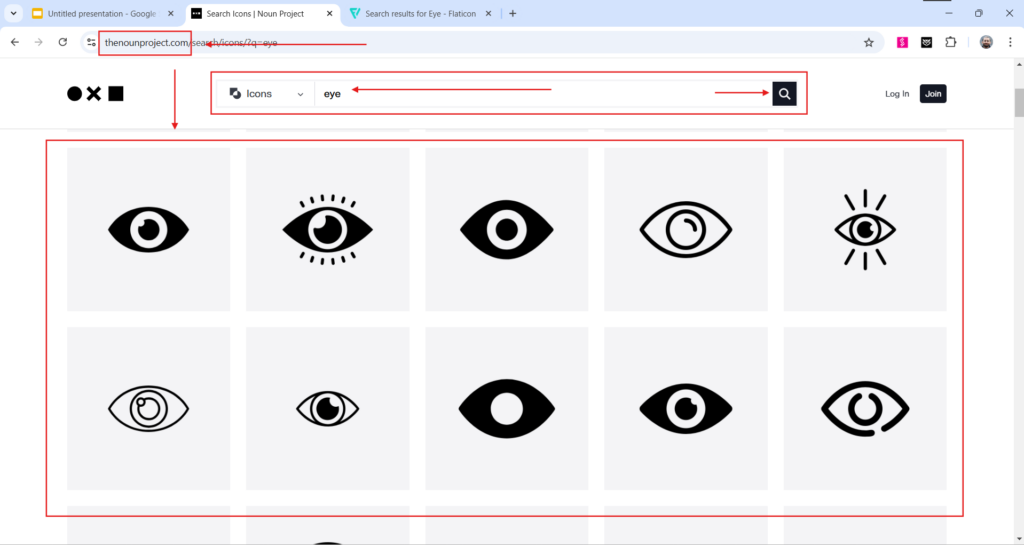
Step 1: Find an Eye Icon
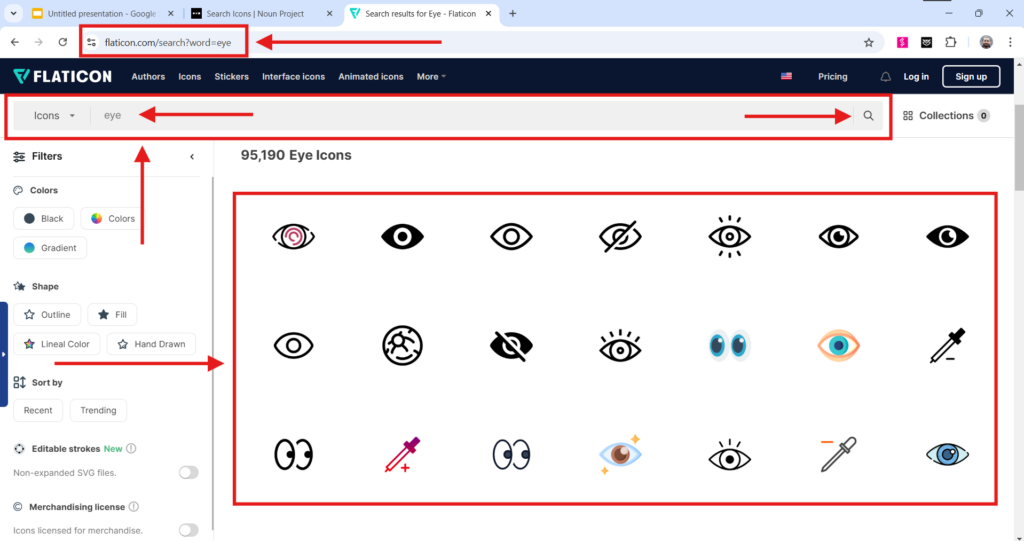
To get started, head over to websites like Flaticon or Noun Project to find a free or licensed eye icon that fits your needs. These sites have tons of options, so you’re sure to find one that works!
Tip: Since you’re working in Google Slides, you can make things easier by downloading the “Icons for Google Slides™ & Google Docs™” add-on. It lets you insert icons quickly without leaving the app.
Step 2: Insert the Icon
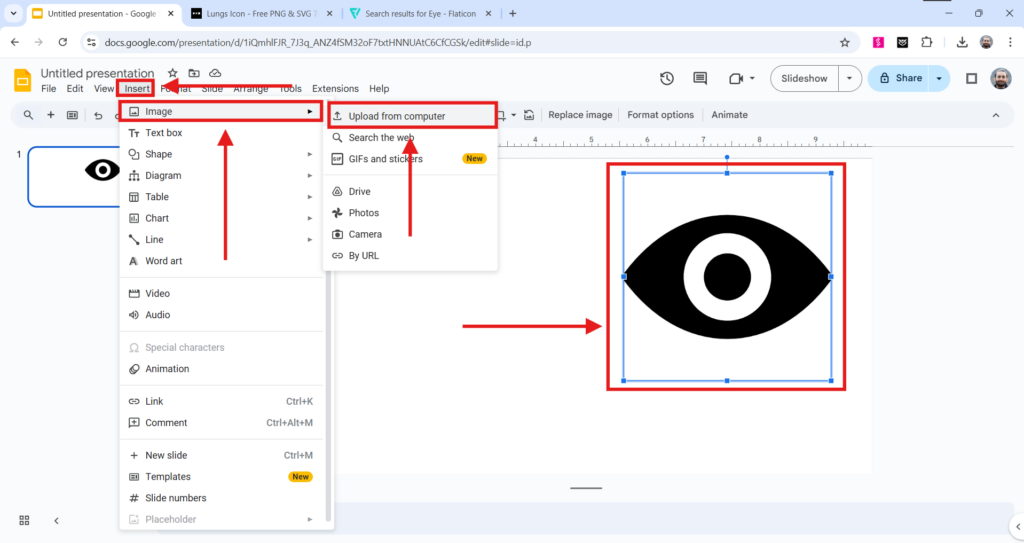
Now, it’s time to add the icon to your slide. Simply go to the top menu, click on “Insert,” then choose “Image,” and select “Upload from Computer.” Find the icon you downloaded and upload it. Once it’s in your slide, you can resize it and move it around to get it just right.
Now you’ve got a sleek eye icon added to your presentation in no time!
Method 3: Creating an Eye Symbol from Scratch
Step 1: Open Google Slides
Start by opening a presentation where you want to add the eye symbol. You can either create a new one or use an existing slide.
Step 2: Make the Eye Outline
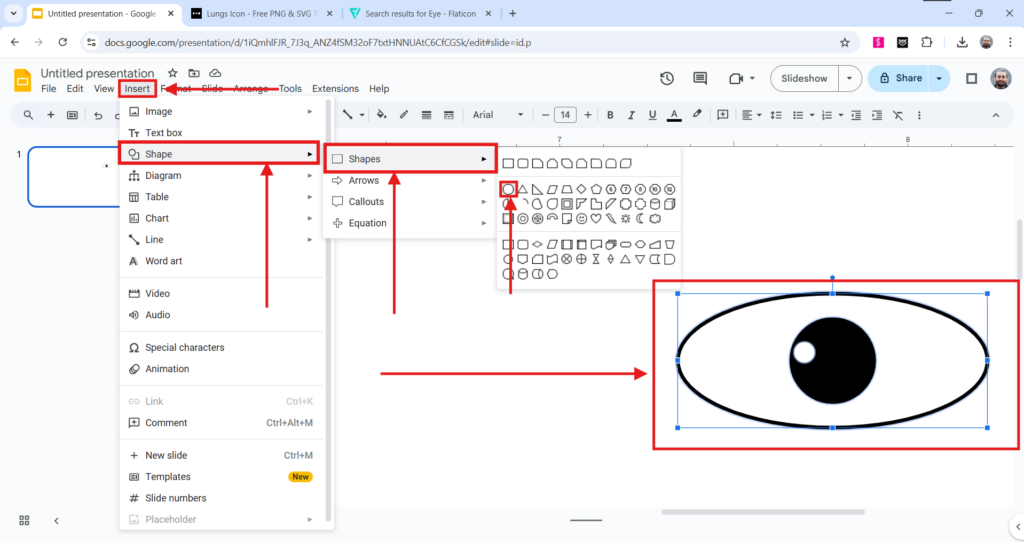
- Click on Insert > Shape > Shapes and pick the circle shape.
- Drag and resize the circle to form the outer outline of the eye. This will be the base of your design.
Step 3: Shape the Eye
- Go back to Insert > Shape > Shapes and select an oval this time.
- Adjust the oval to create the main shape of the eye, positioning it around the circle you just made.
Step 4: Add the Iris
- Now, add a smaller circle to represent the iris.
- Go to Insert > Shape > Shapes and pick a circle again. Resize it and place it inside the oval. You can change the color to match the look you’re going for.
Step 5: Add the Pupil
- Inside the iris, add another, even smaller circle.
- Make this one black to serve as the pupil. Position it neatly in the center of the iris.
Step 6: Play with Colors
- Customize the colors of the iris, pupil, and the outline of the eye using the Fill Color tool. Choose shades that suit your style or match the theme of your slide.
Step 7: Optional Touch: Add Eyelashes
- For some extra detail, you can draw eyelashes using the Line or Curve tools. Add a few lines around the eye to make it more expressive and lifelike.
<SlidesAICTA2 />
Closing Thoughts
Adding an eye symbol to your Google Slides is a quick way to make your presentation stand out. Whether you go with a pre-made icon, or special characters, or create one from scratch, it’s all about keeping it simple and fun. Give these methods a try, and watch your slides come to life!
Frequently Asked Questions
1. How can I add symbols to my Google Slides?
To add symbols, click on Insert in the top menu, then choose Special characters. From there, you can search for the symbol you want or pick one from the options provided.
2. What about emojis? How do I include those?
Adding emojis is just as easy. Go to Insert > Special characters, type “emoji” in the search bar, and select the one you like.
3. How do I add special characters?
It’s the same process. Click on Insert, then Special characters, and either browse through the options or search for a specific character to add it to your slide.
4. Can I use icons in my slides?
Absolutely! For icons, go to Insert > Image. You can upload an icon file from your computer or use the built-in Google Image search to find one.
Related Posts
-

If you’ve ever looked at a slide and thought, “This could use a little extra…
-

Want to add videos to your Google Slides presentations on your iPad? While the Google…
-

Working with multiple slides at once in Google Slides can save you a lot of…
-

In Google Slides, you might need to add footnotes to include extra information or citations.…
-

Putting together a presentation can be a creative process. It takes some thought and effort…
Leave a Reply