In professional presentations, timing is crucial. Adding a timer to your Google Slides can keep you on track and your audience engaged. In this guide, we’ll explore simple ways to integrate timers, like embedding YouTube countdowns or using timer add-ons. These techniques ensure your presentation flows smoothly and captivates your audience from start to finish.
How Does a Timer Work in Google Slides Presentations?
- Google Slides doesn’t have a built-in timer, but you can include a timer video in your slides.
- Once you add the timer video, you can adjust how it looks to match your presentation.
- Both you and your audience can see the timer ticking down during your presentation.
- You can move the timer around and place it next to your text and pictures, or make it the main focus on a slide.
How to Add a Timer to Google Slides
Method 1: Embedding YouTube Videos as Countdown Timers in Google Slides Presentation
Step 1: Open Your Google Slides Presentation:
- Go to slides.google.com on your computer.
- Open an existing presentation or create a new one.
Step 2: Select the Desired Slide:
- Choose the slide where you want to embed the timer.
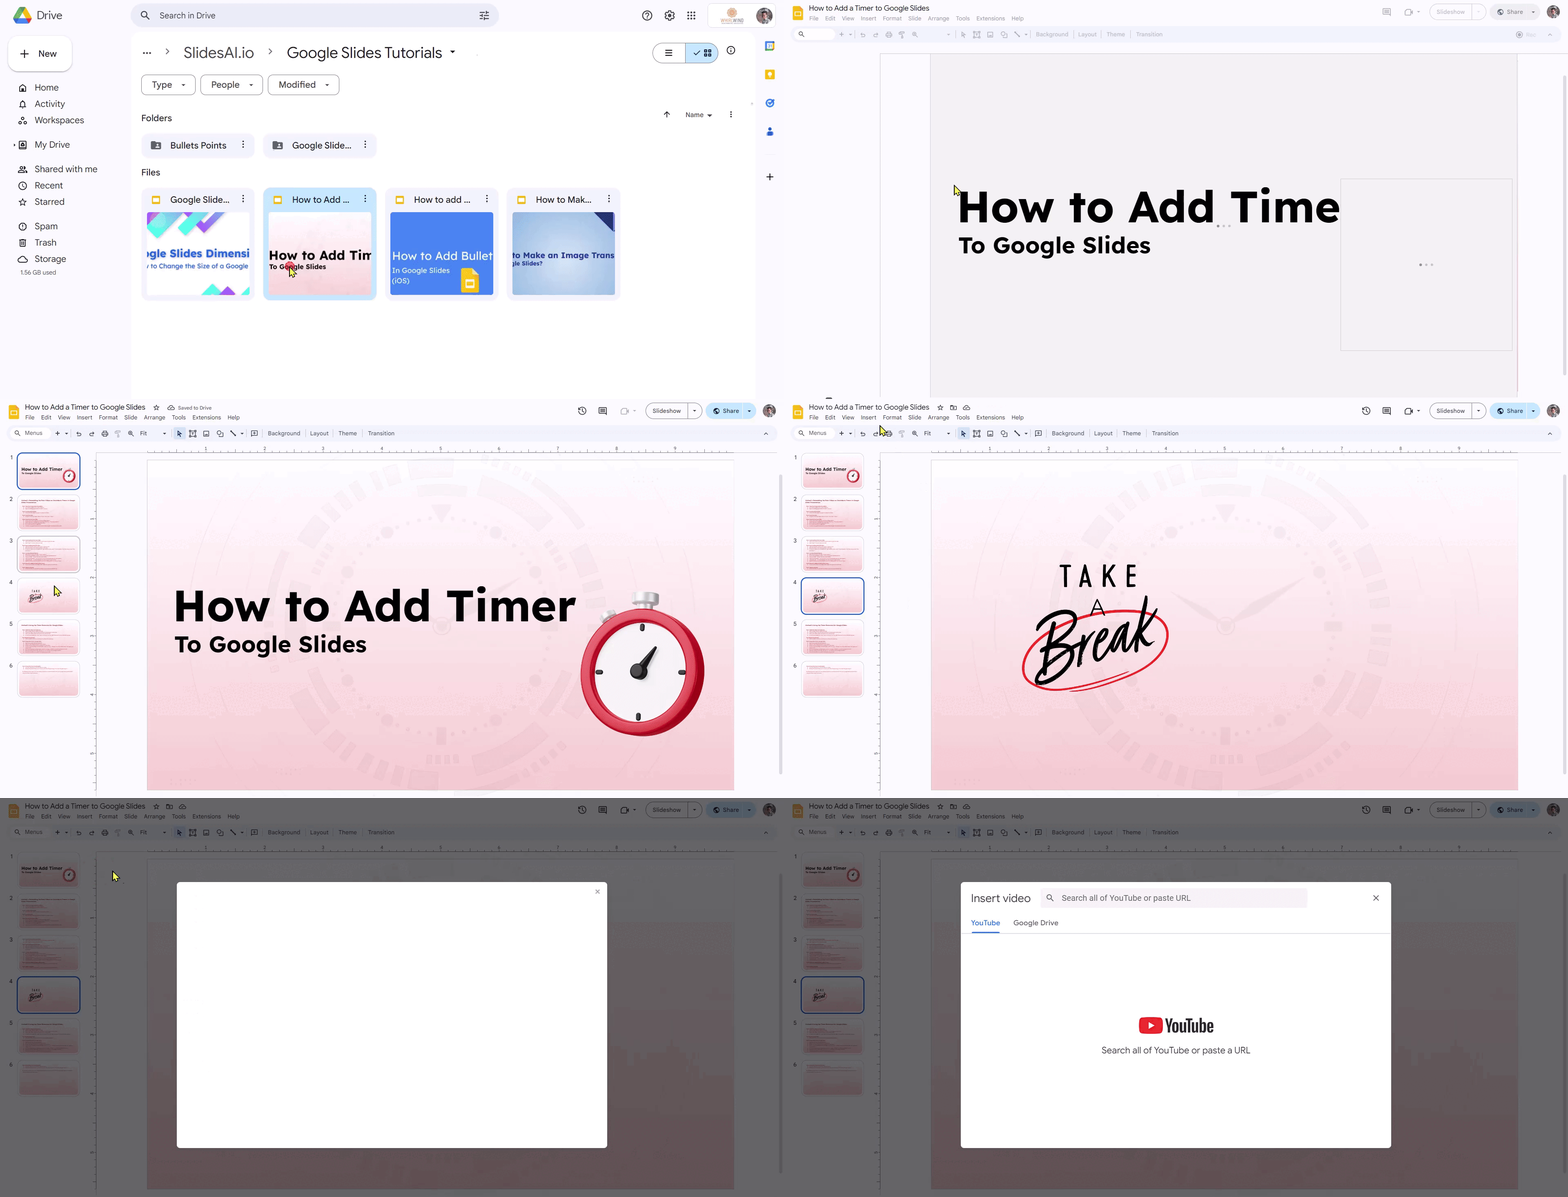
Step 3: Insert the Video:
- Navigate to the top toolbar, click on “Insert,” then select “Video.”
Step 4: Search for the Timer Video:
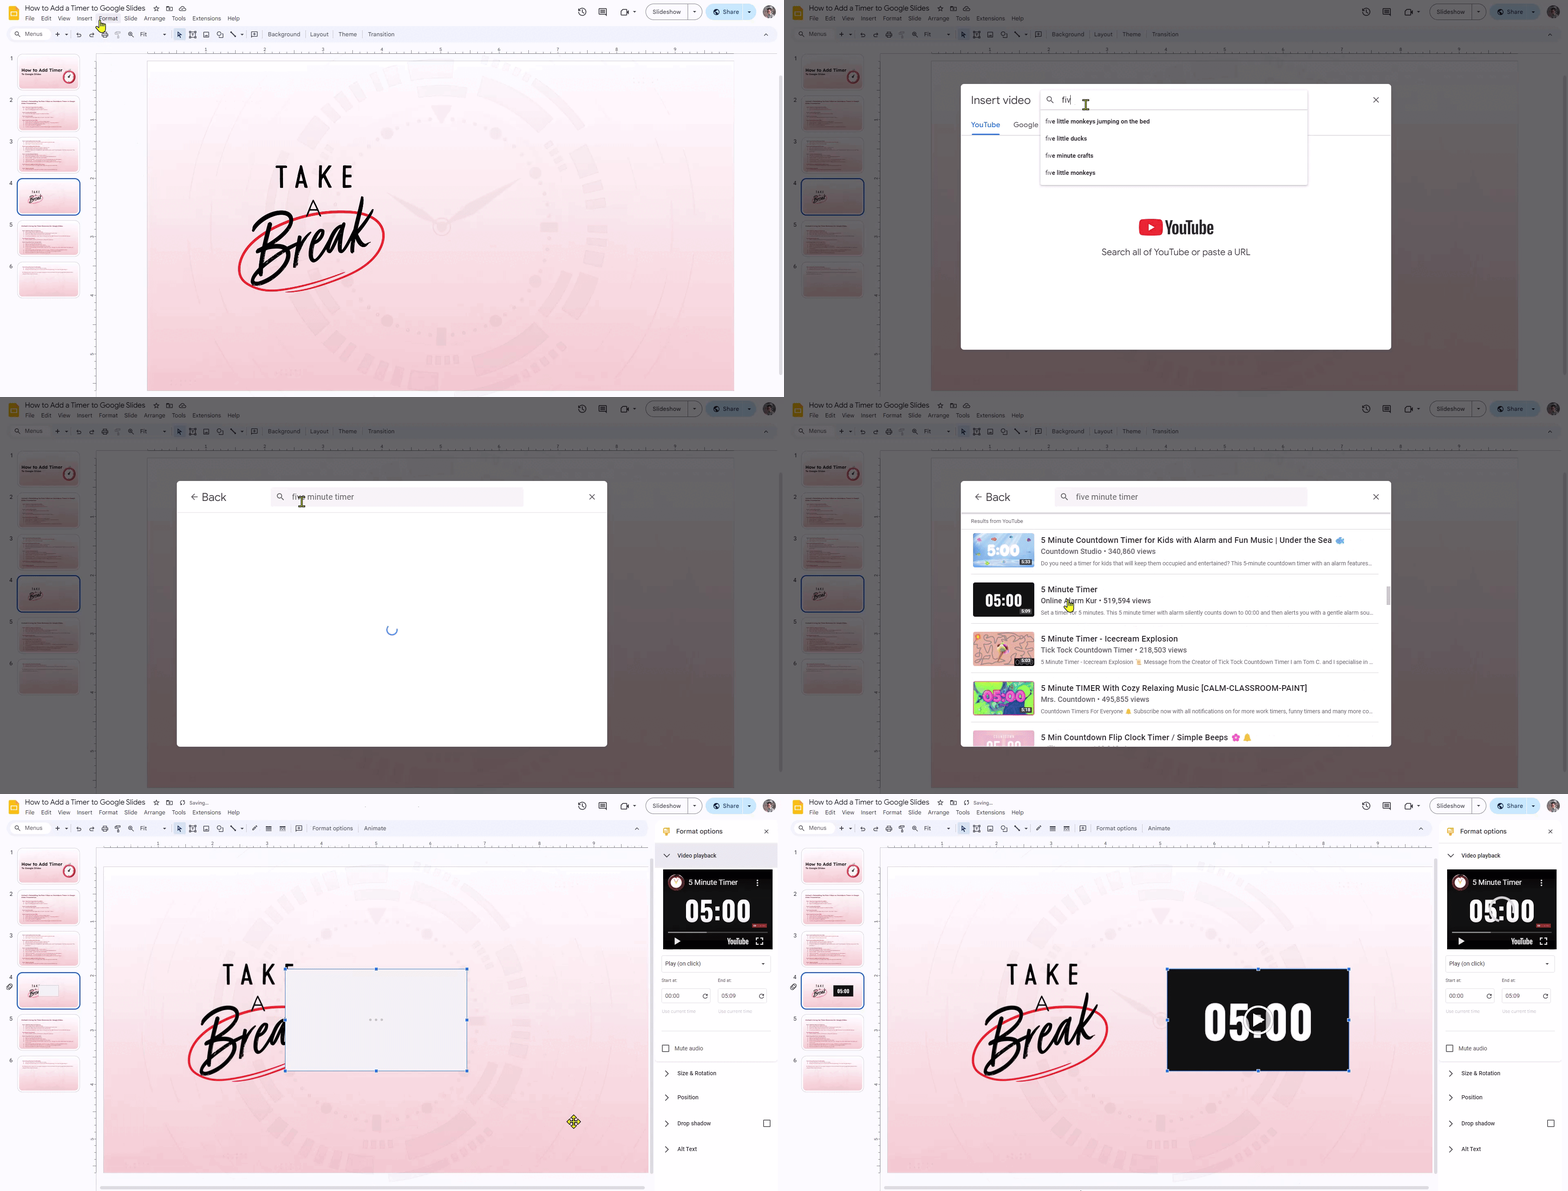
- In the “Insert video” window, you have multiple options:
- Search directly on YouTube for a countdown timer (e.g., “five-minute timer”).
- Paste a URL of a specific YouTube timer video.
- Use a video from your Google Drive.
- Consider using specific keywords or desired timer lengths for more accurate results.
Step 5: Select and Insert the Timer Video:
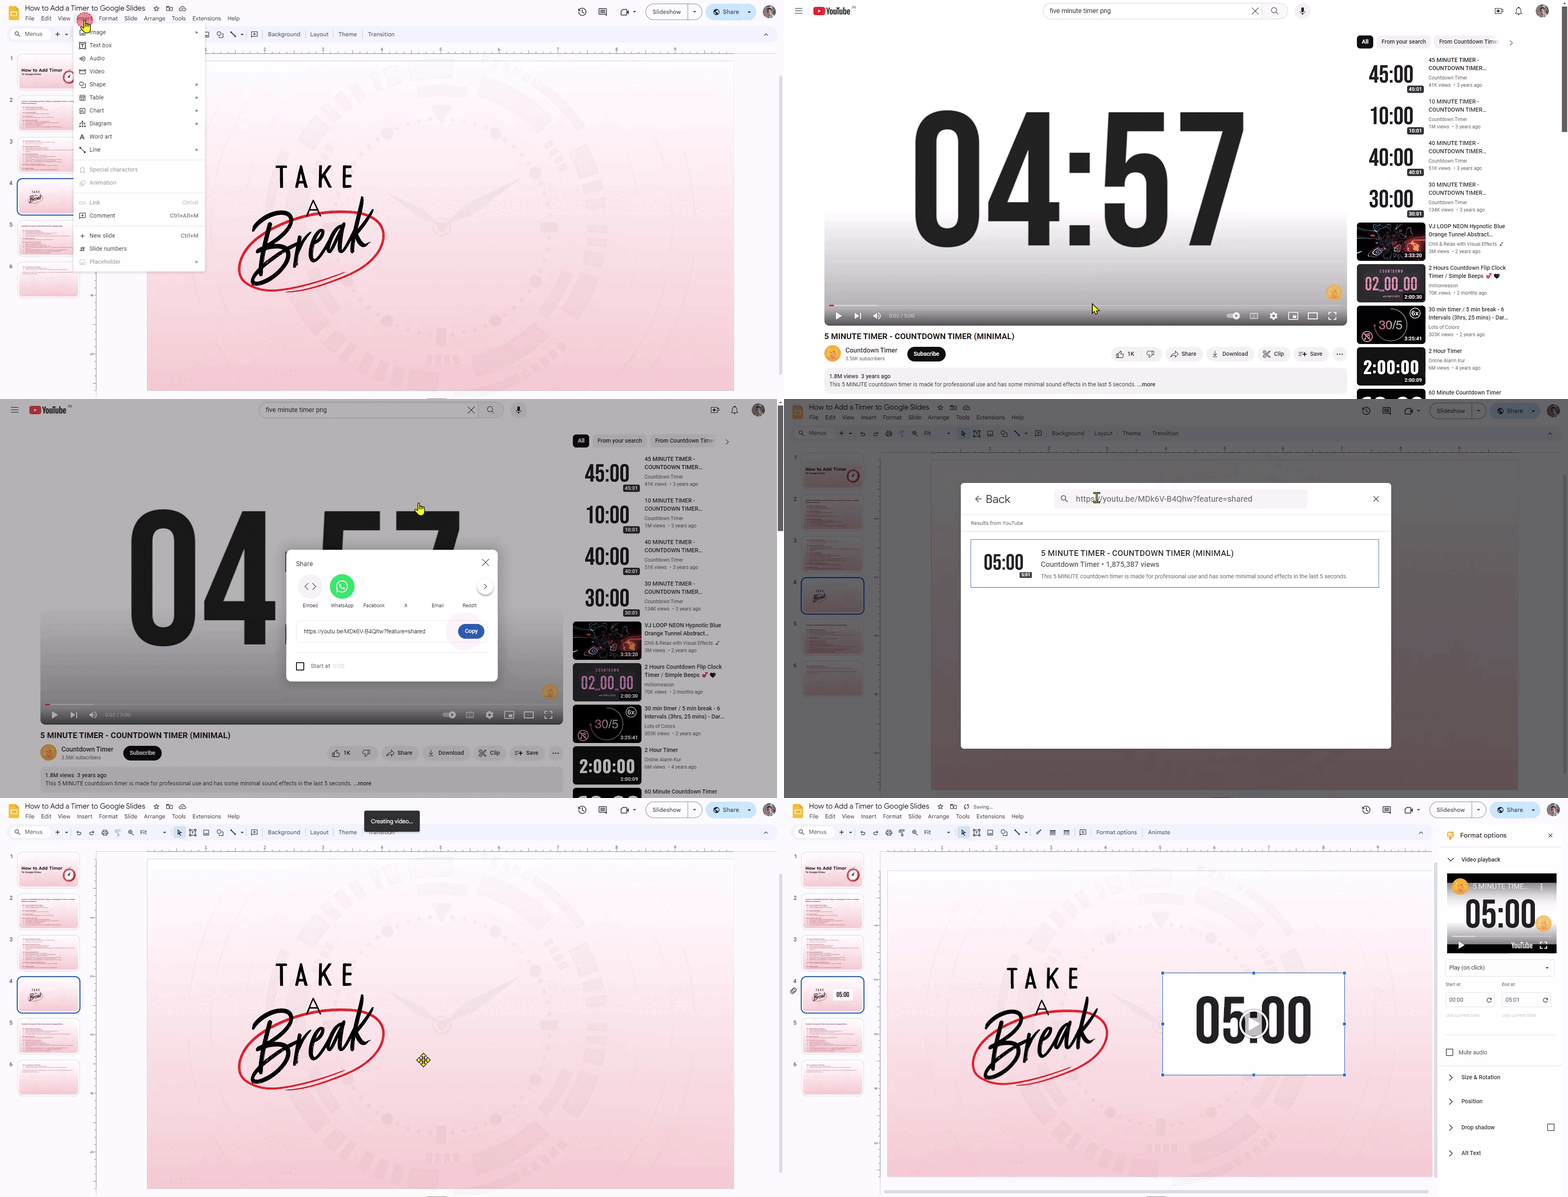
- Click on the desired video from the search results or paste the URL.
- Click “Select” to insert it into your slide.
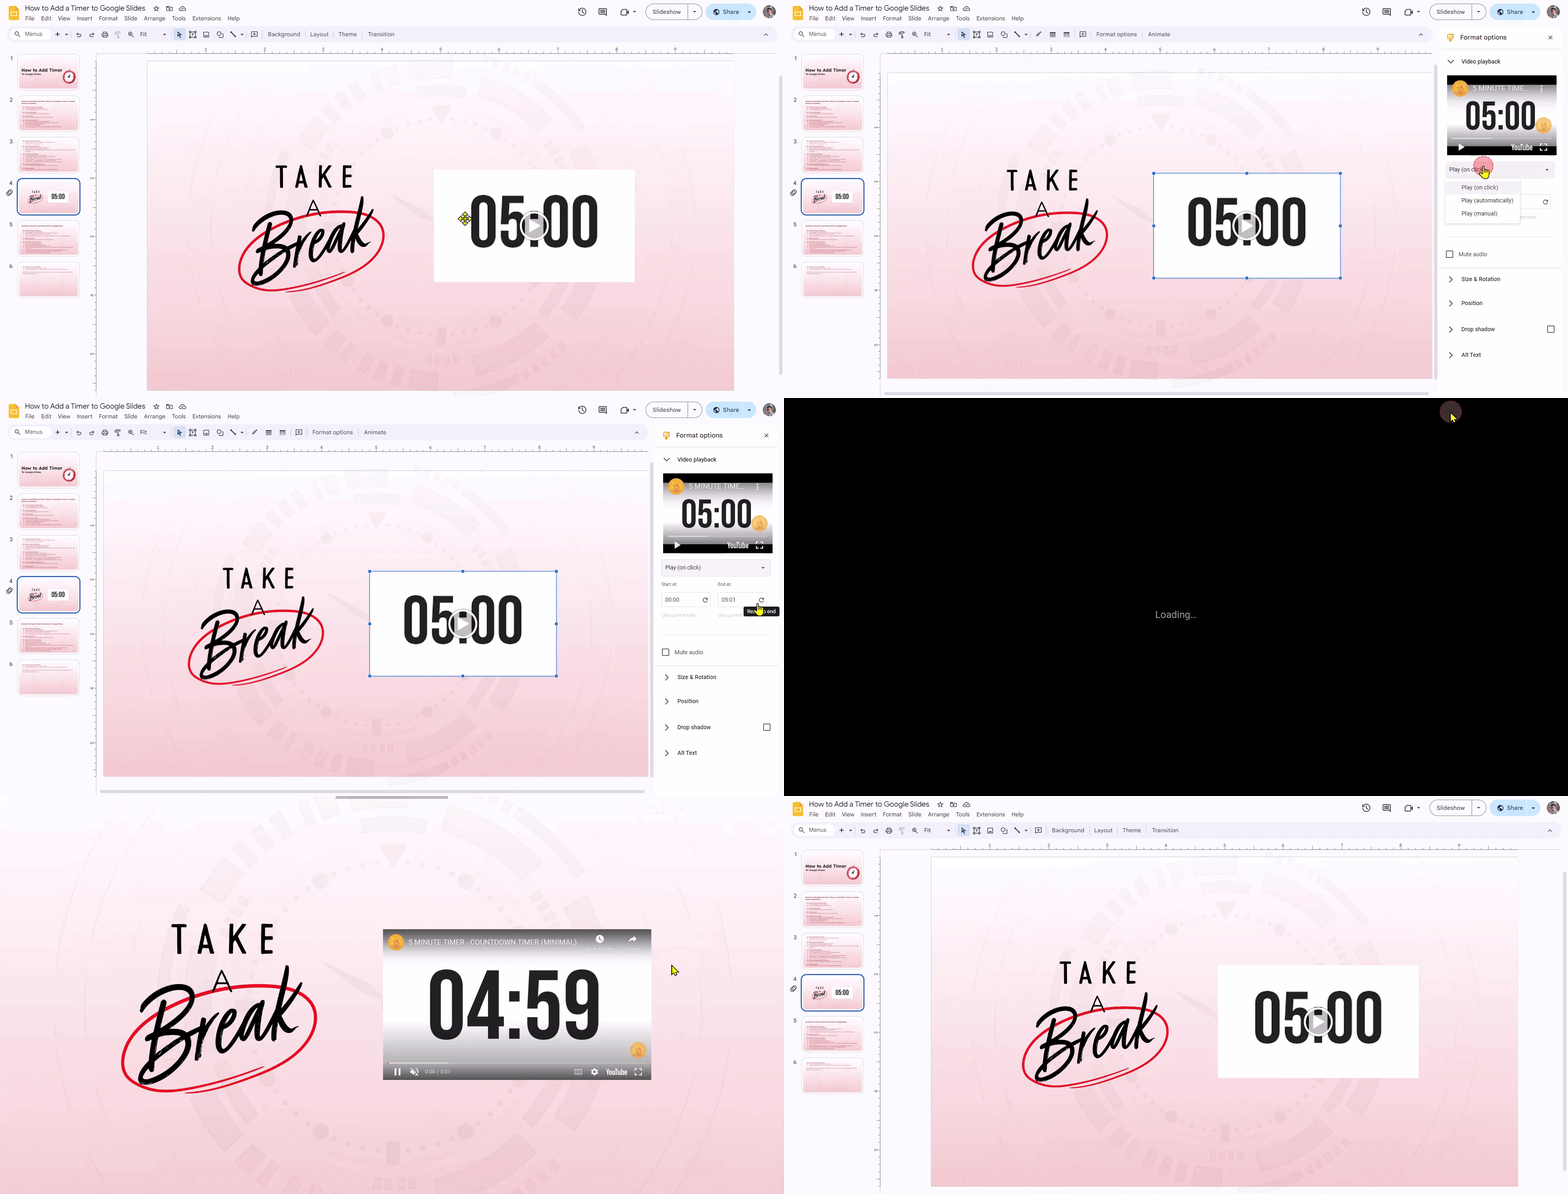
Step 6: Resize and Reposition the Video:
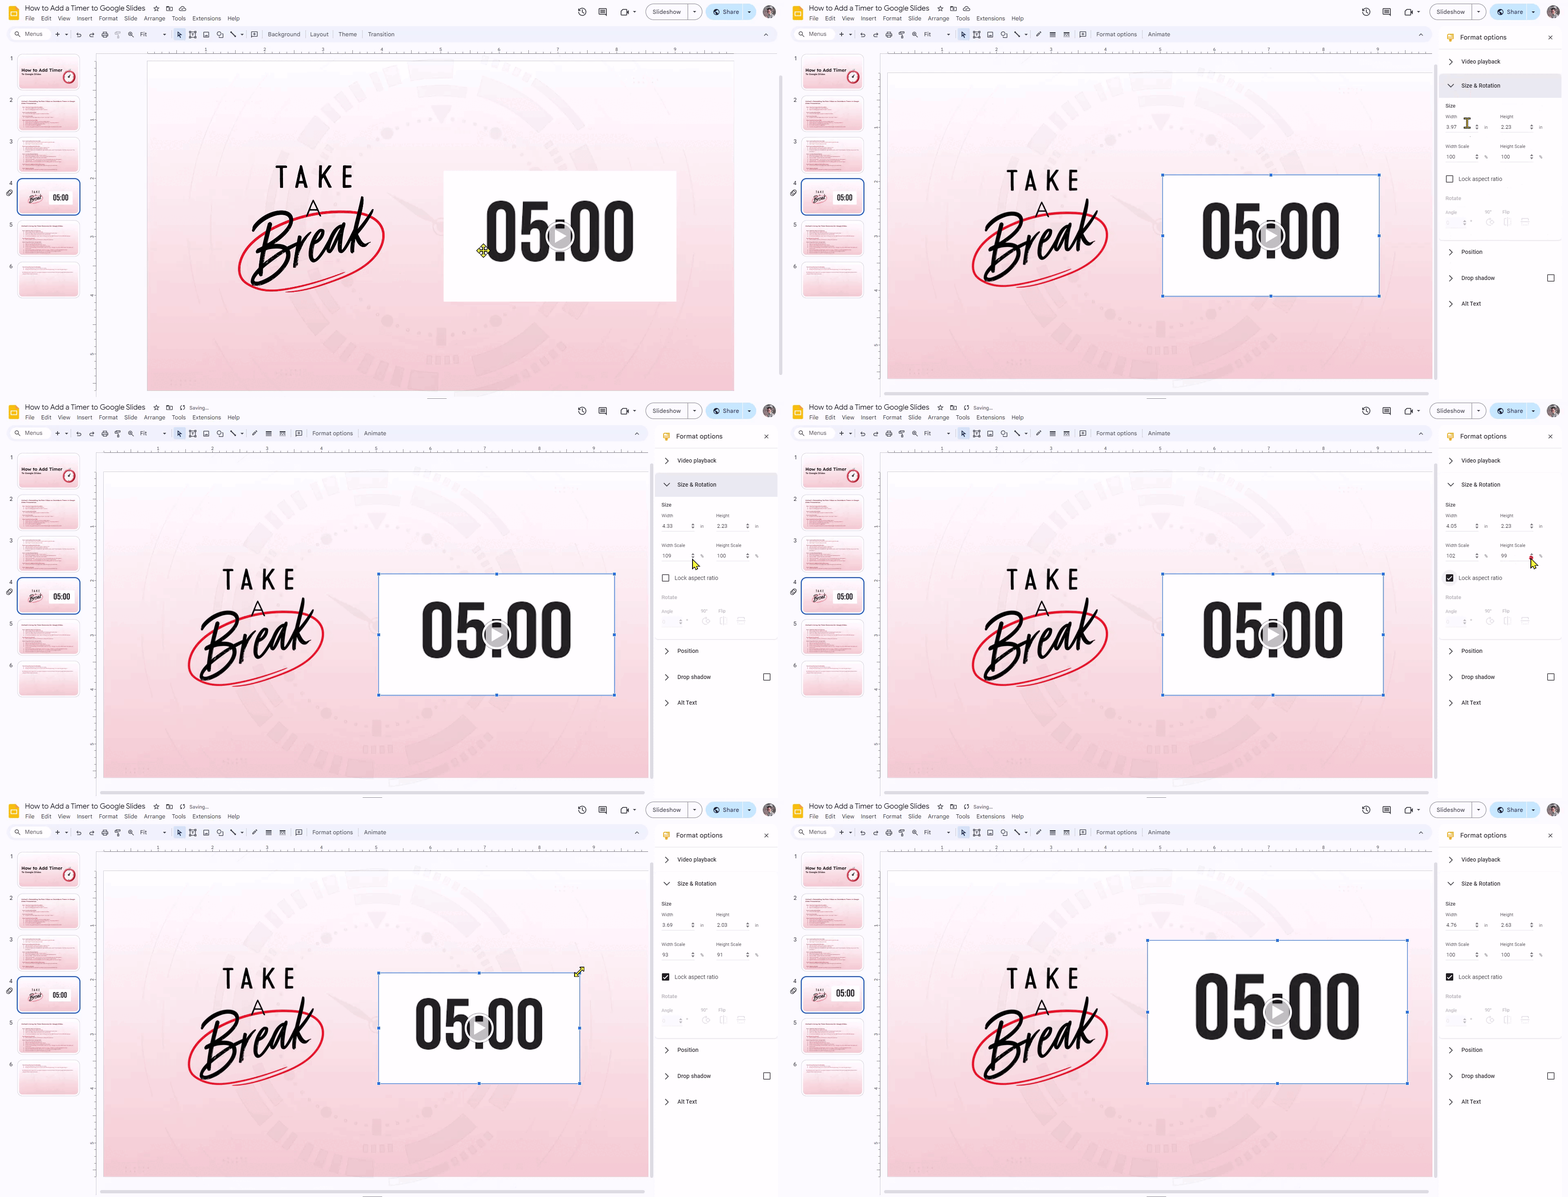
- Click and drag the corners of the video to adjust its size.
- Move the video to the desired position on the slide.
- For precise dimensions and placement, right-click the video, select “Format options,” and then adjust under “Size & Rotation.”
Step 7: Set Video Playback Options:
- Right-click the video and select “Format options.”
- In the “Video playback” section, choose your preferred playback mode:
- “Play (on click)” – to start the video when clicked.
- “Play (automatically)” – for the video to start automatically when the slide appears.
- “Play (manual)” – to control the play manually during the presentation.
- Optional settings include muting the audio and setting specific start and end times.
Step 8: Repeat for Additional Slides (If Necessary):
- If you need the timer on multiple slides, repeat the process for each slide.
Step 9: Adjust as Needed:
- Ensure the timer fits well with your slide’s content and presentation style.
By following these steps, you can effectively embed a YouTube video as a countdown timer in your Google Slides presentation, enhancing its functionality and audience engagement.
Ready to mesmerize your audience? Uncover the secrets to flawless video integration with our comprehensive guide.
Learn more on How to Add or Embed a Video into Google Slides?
Method 2: Using the Timer Extension for Google Slides:
Step 1: Install the Slides Timer Extension:
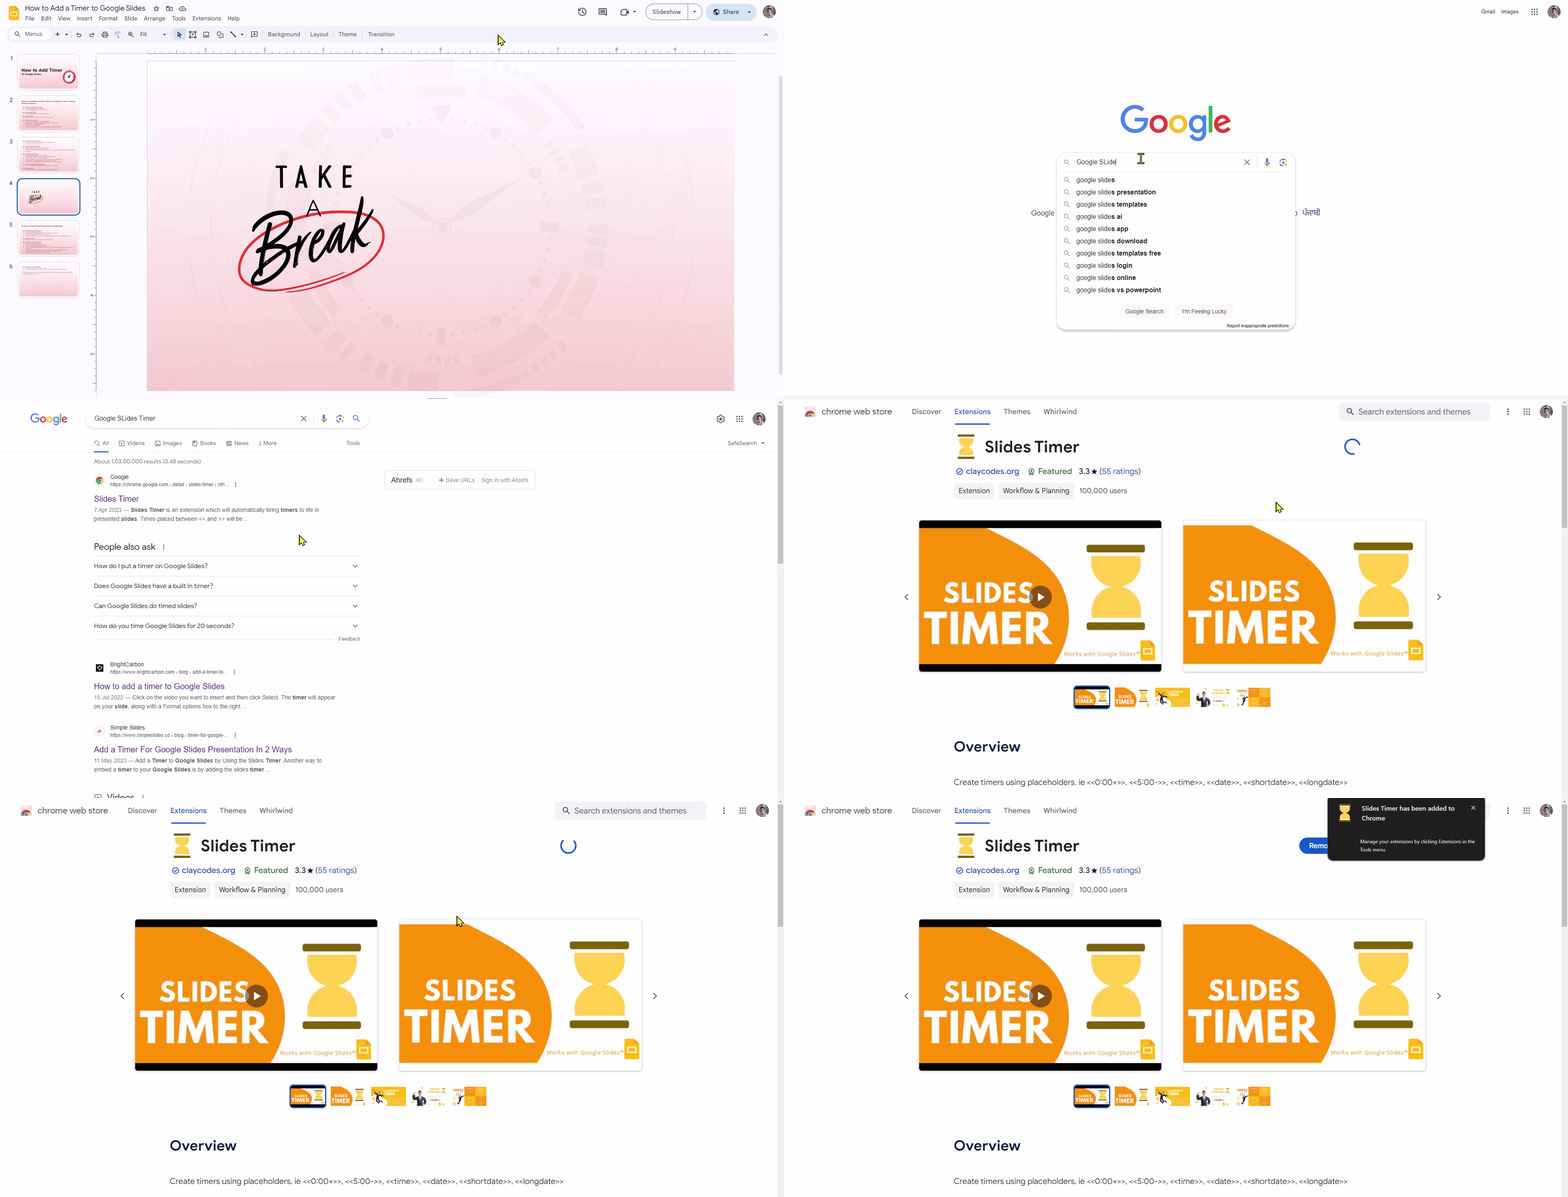
- Open Google Chrome or Microsoft Edge.
- Search for “Slides Timer Chrome extension” in the browser’s address bar.
- Click on the “Slides Timer extension” in the search results.
- In the Chrome Web Store, select “Add to Chrome” and then “Add extension” in the notification pop-up.
Step 2: Restart Your Browser:
- After installation, restart your browser to activate the extension.
Step 3: Using Slides Timer in Google Slides:
- Open your Google Slides presentation.
- Click on a slide where you want to add a timer.
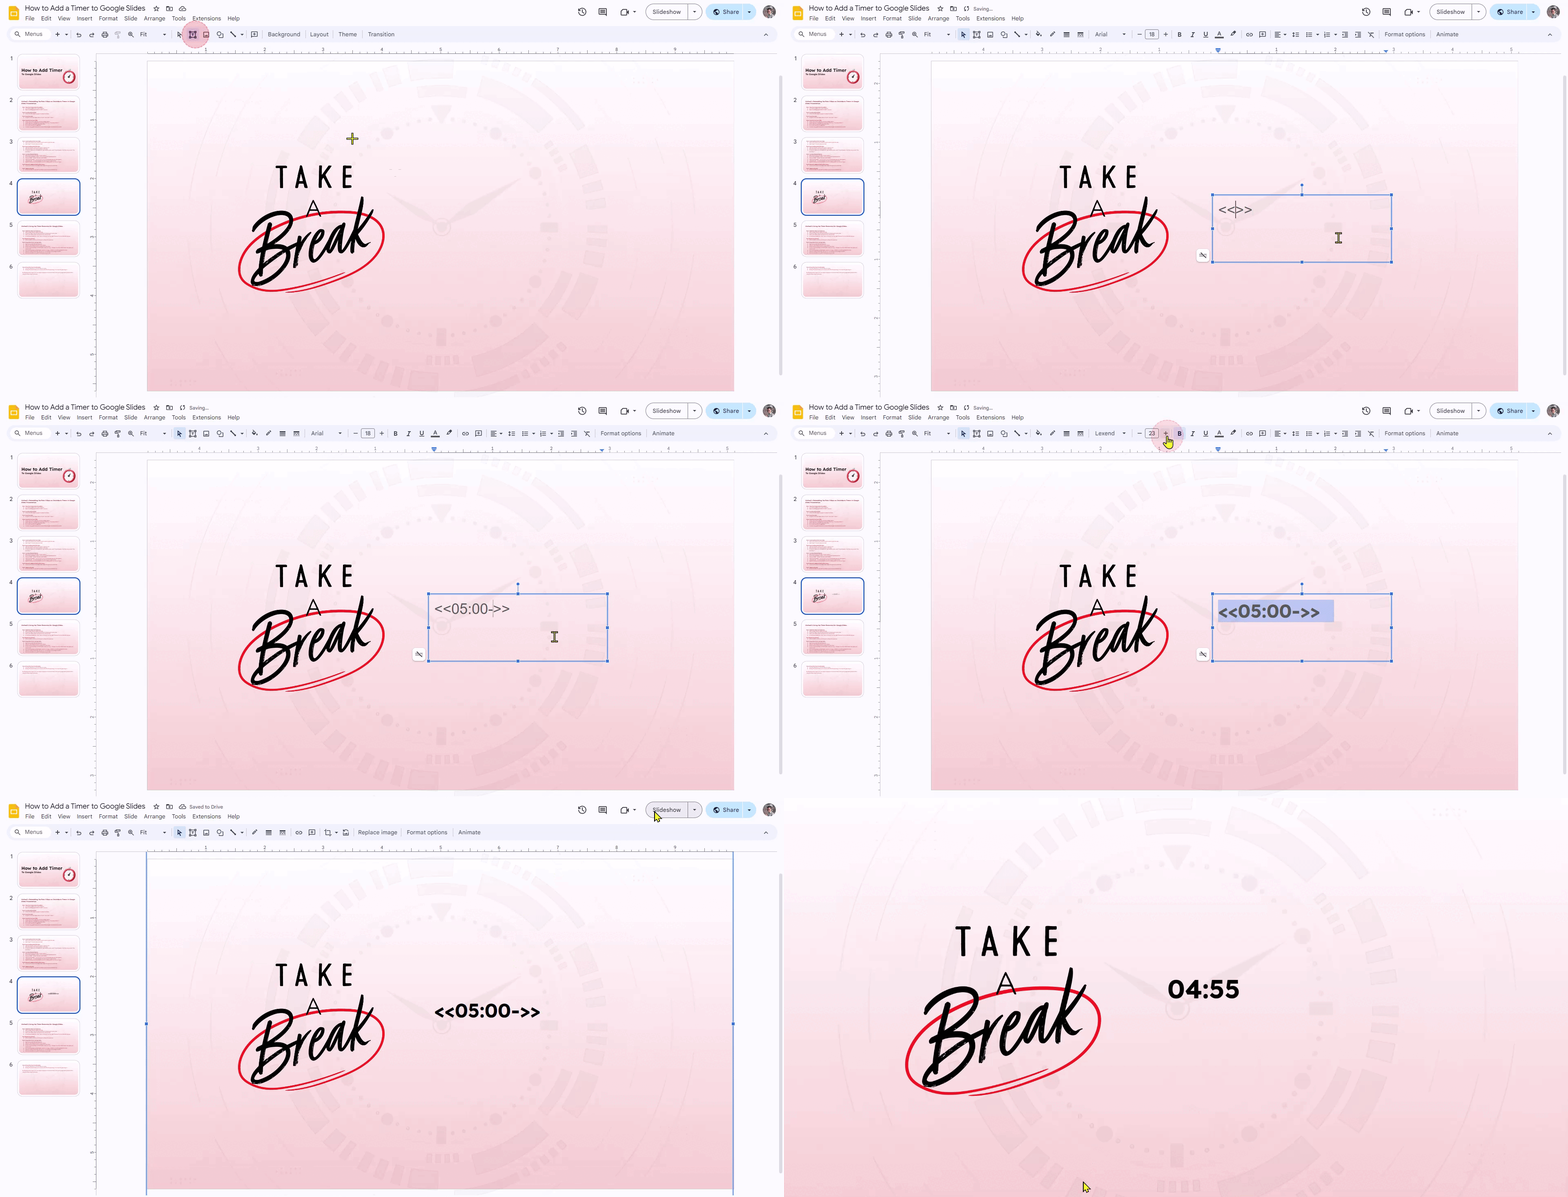
- Create a new text box or use an existing one on the slide.
- To set a countdown timer, use the format <<mm:ss>> (e.g., <<05:00>> for a five-minute timer). This will count down to zero.
- For a count-up timer, use the format <<mm:ss+>> (e.g., <<00:00+>> to start counting from zero).
- Advanced timing formats like <<hh:mm:ss>> can also be used for longer durations.
- Place the formatted text within the text box on your slide.
Step 4: Check the Timer Functionality:
- Start the slideshow to see the timer in action.
- During the presentation, you can pause the timer by pressing ‘d’ or reset it by pressing ‘e’.
By following these steps, you can easily incorporate a functional timer into your Google Slides presentations using the Slides Timer extension.
<SlidesAICTA1 />
Benefits of Adding a Timer to Your Google Slides Presentation:
- Improved Time Management: Adding a timer helps you avoid running over time by keeping track of your allotted slot, ensuring all key points are covered efficiently.
- Enhanced Pacing: A visible countdown helps you regulate your speaking speed, allowing you to slow down or speed up to maintain a natural flow and keep the audience engaged.
- Increased Audience Engagement: The timer creates a sense of urgency that keeps your audience attentive and aware of when activities or discussions will end, making sessions more interactive.
- Clearer Structure: By allocating specific time slots for each section, the timer brings organization to your presentation, making it easier for you and your audience to follow along.
- Reduced Anxiety: The timer acts as a helpful guide, reducing the stress of constantly checking the time and allowing you to focus more on your delivery.
- Efficient Activities: Timers make timed segments like quizzes, writing prompts, or Q&A sessions more focused and efficient for everyone involved.
- Professionalism: Using a timer shows respect for your audience’s time and demonstrates your preparedness, enhancing your credibility as a speaker.
You can download our Countdown Timer Presentation Template.
Closing Thoughts
Adding a timer to Google Slides presentations is more than just a technical feature – it boosts professionalism and keeps the audience interested.
While there are some limits to how much you can customize it, the advantages of better time management and focused content delivery are clear.
Practicing with the timer helps you deliver a smooth, well-paced presentation, so it’s a great tool to use for any impactful Google Slides presentation.
<SlidesAICTA2 />
Frequently Asked Questions About Adding a Timer to Google Slides
1. Can I set different times for different slides using timers?
Yes, you can choose different times for specific slides to control the pace of your presentation using timers.
2. Can I customize the appearance of timers to match my presentation theme?
You can personalize the look of timers to match your presentation theme by adjusting font, color, and style options available in many timer tools.
3. Do timers work smoothly on different devices and browsers?
While timers are designed to work on various platforms, it’s a good idea to test your presentation across different devices and web browsers to ensure seamless compatibility.
4. How do I add a timer to a specific slide in Google Slides?
To include a timer on a particular slide in Google Slides, you can insert or embed a timer video. You have the option to create your own timer video or download one from the internet.
5. How can I make sure the timer Is visible but doesn’t distract from the main content?
Place the timer strategically on the slide to ensure it doesn’t obscure important information and blends well with the overall theme. Once you master adding timing to Google Slides, you can effectively leverage timers to enhance your presentations.


