The font you choose can make a major difference in your PowerPoint presentations. While the default fonts are okay, you might want to add your own for a more specific look. Luckily, adding fonts to PowerPoint is quite easy. This can improve the appearance of your slides and help you get your message across more clearly.
In this article, we’ll show you the simple steps to add fonts in PowerPoint, letting you personalize your presentations and keep your audience engaged.
Why Adding Fonts Improves the Quality of a PowerPoint Presentation?
Using different fonts can make your PowerPoint presentations even better in a few ways:
- Fonts Can Help Set the Tone: Different fonts have different styles. You can choose a font that feels serious and professional for a business presentation, or a more playful one for a creative project. This helps people listening to your presentation understand the feeling you’re trying to get across.
- Fonts Can Make Things Easier to Read: Some fonts are clearer and easier on the eyes than others. Picking a good font can help people follow along with your presentation without getting tired of looking at the slides.
- Fonts Can Help With Brand Recognition: If you have a business with a specific font, using that font in your presentations can help people remember who you are.
Overall, taking a little extra time to choose the right fonts can make your presentations look better, be easier to understand, and leave a stronger impression on your audience.
How to Add Fonts to PowerPoint?
Here’s a breakdown on how to add new fonts to your PowerPoint presentations:
Step 1. Finding the Perfect Font:
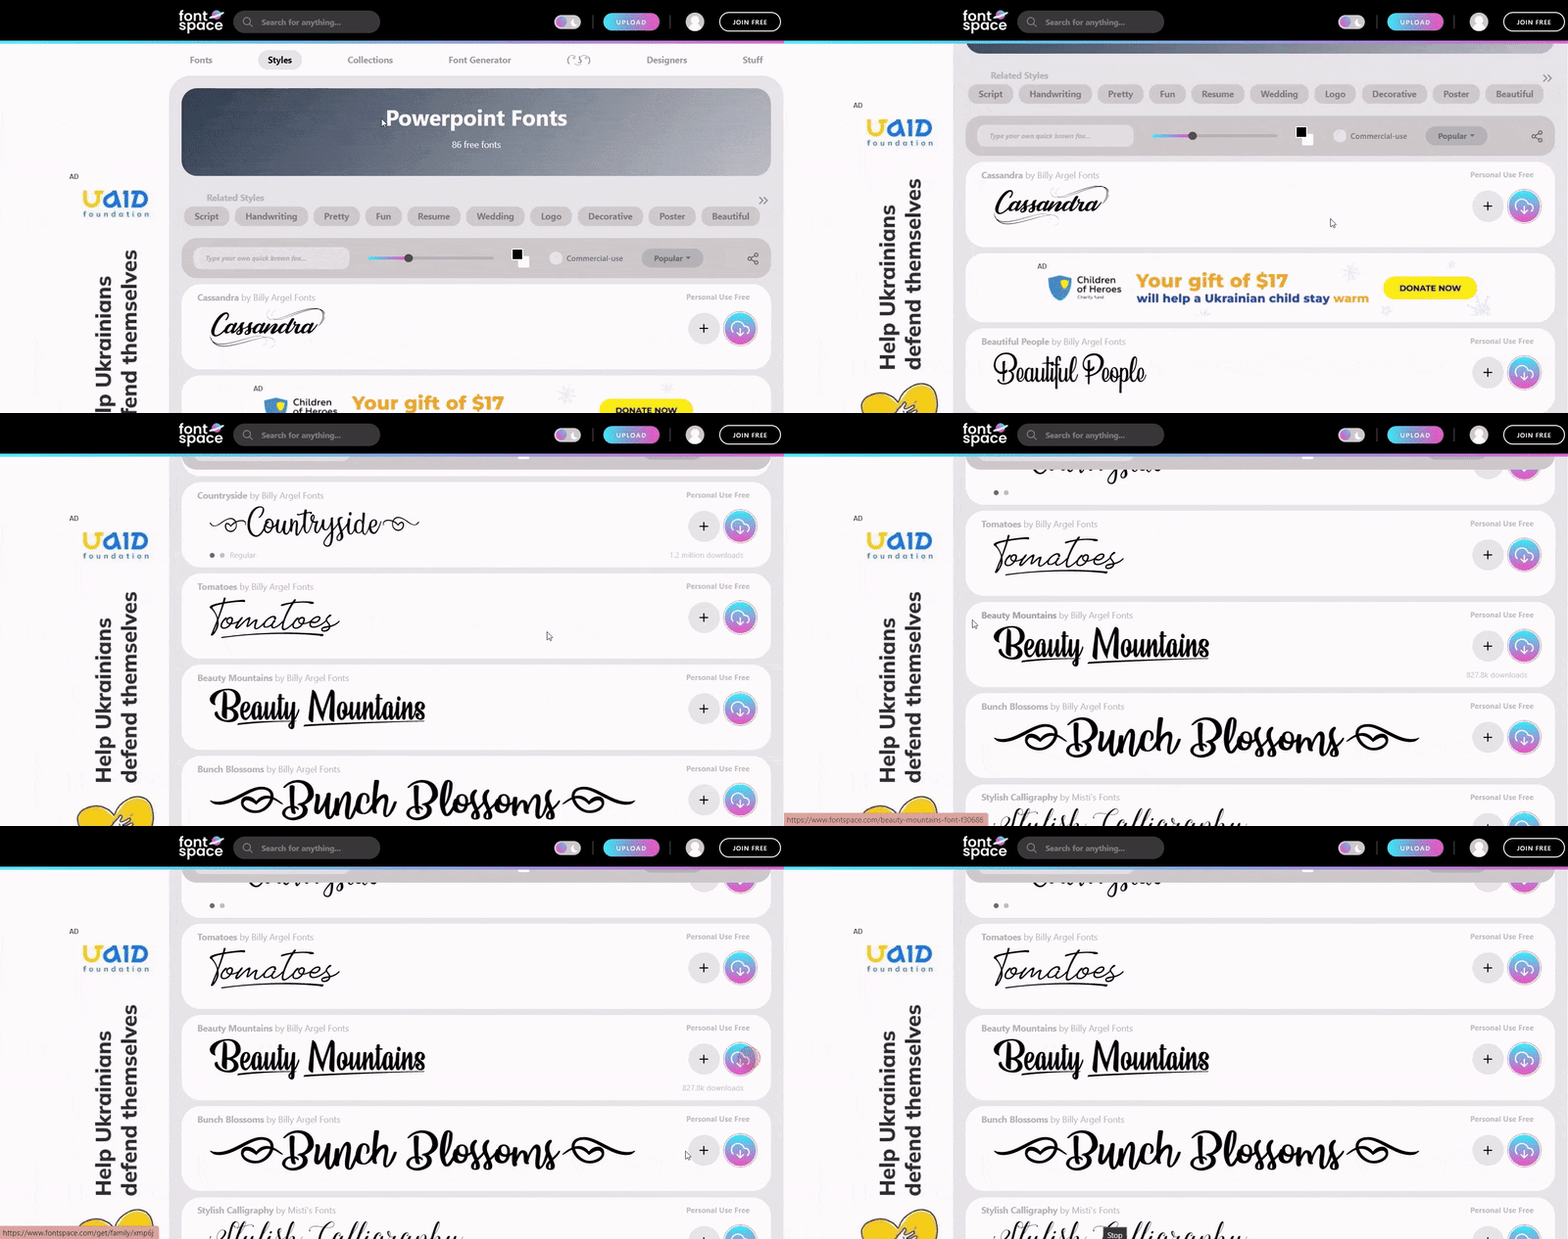
First things first, pick a font that complements the style and theme of your presentation. There are many reputable websites offering free fonts to download. Once you’ve found the ideal font, download it to your computer.

Step 2. Installing the Font (Windows & Mac):
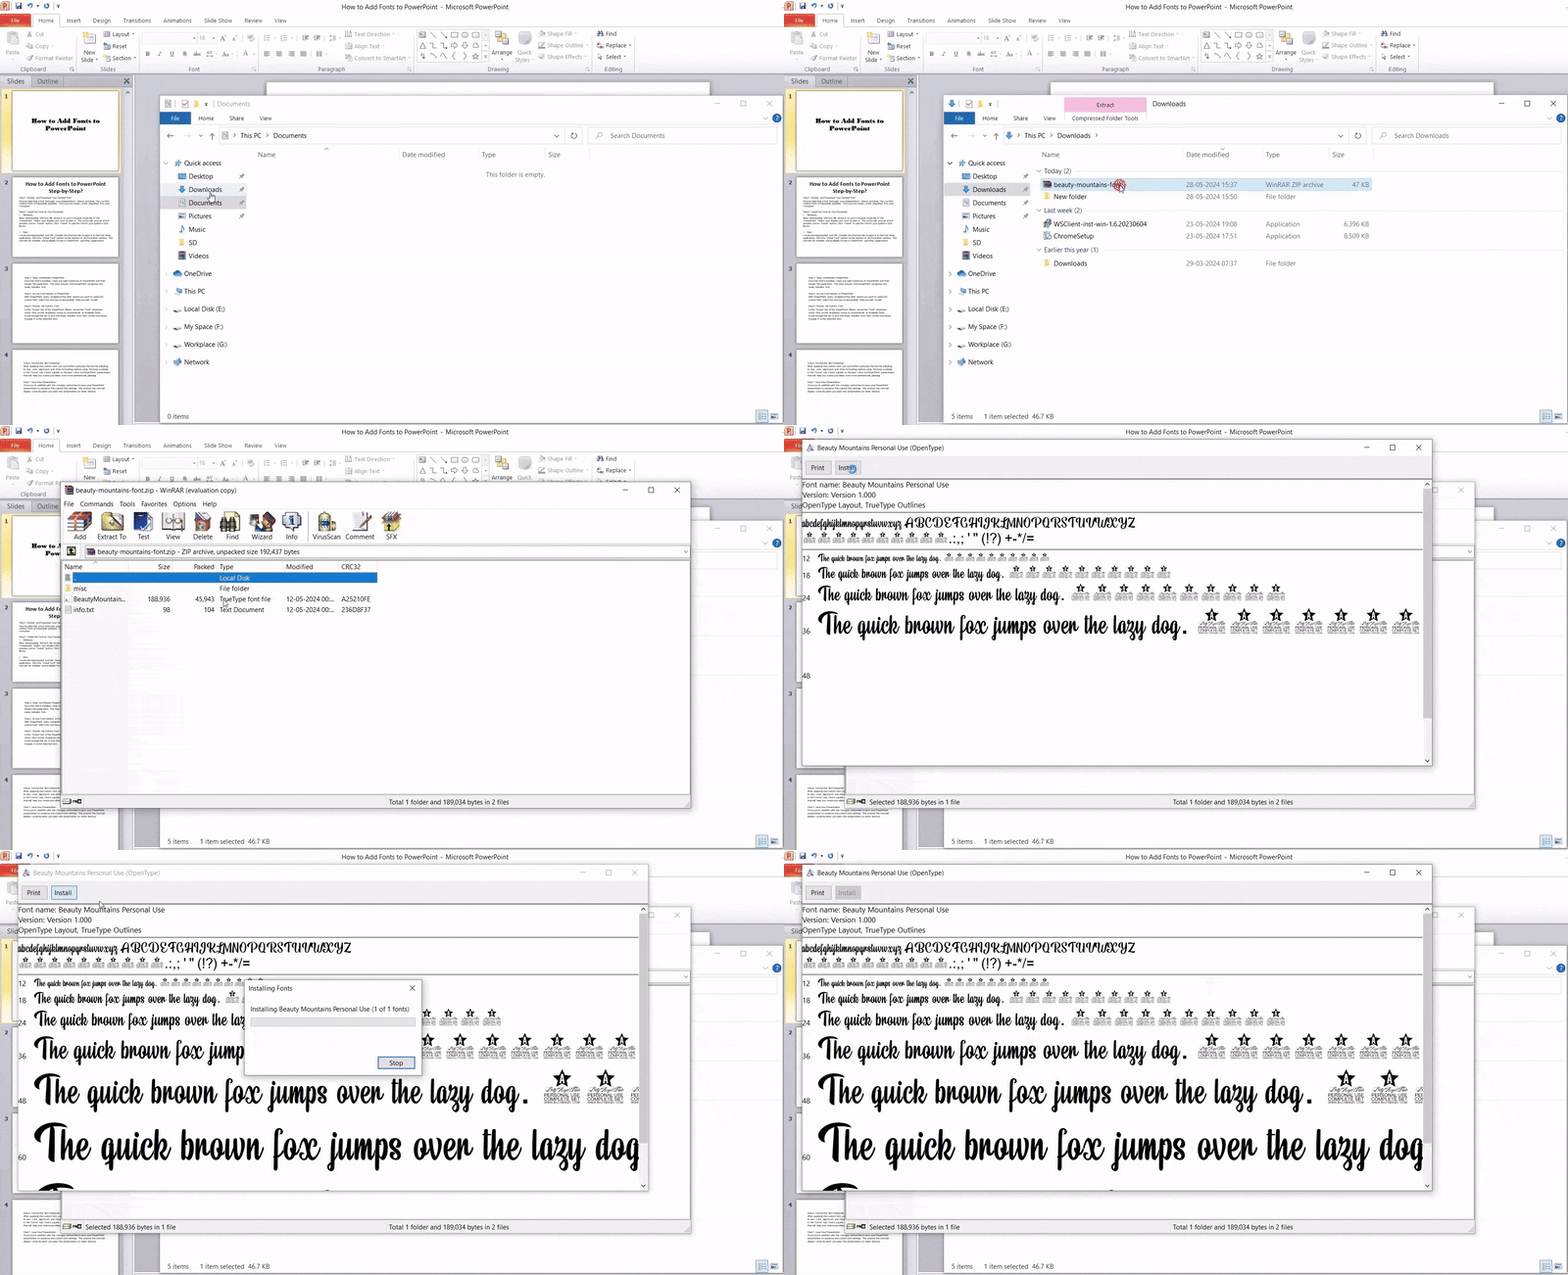
- Windows: Locate the downloaded font file (usually in “Downloads”) and double-click it. You’ll see a preview and an “Install” button. Click “Install” to add it to your system’s font library.
- Mac: Double-click the downloaded font file to open it in Font Book. Click “Install Font” at the bottom of the window.

Step 3. Restarting PowerPoint:
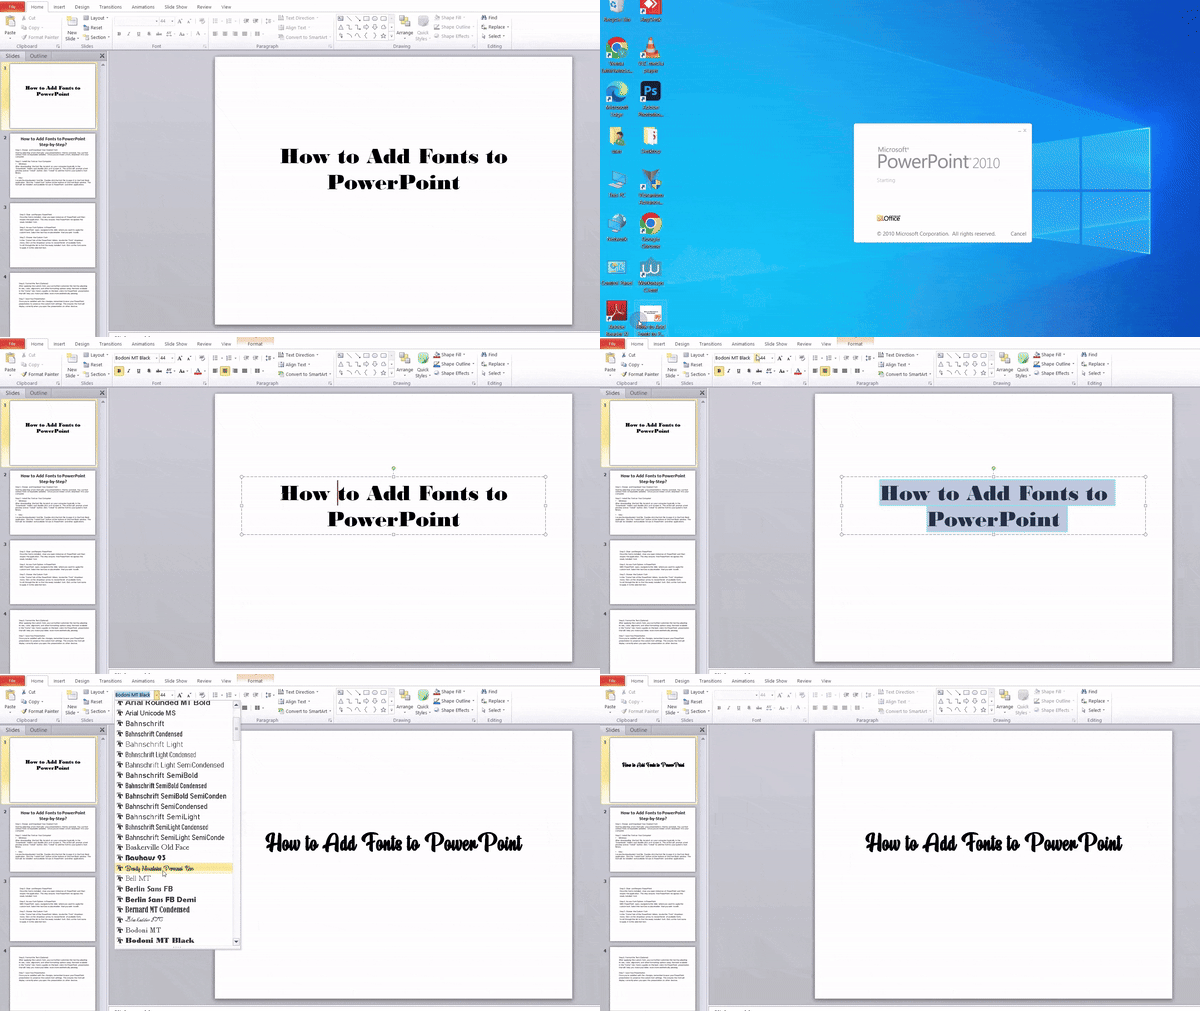
Once the font is installed, close any open PowerPoint presentations and then reopen the program. This ensures PowerPoint recognizes the new font.
Step 4. Applying the Font:
Open your presentation and go to the slide where you want to use the new font. Select the text box or placeholder you want to edit.
Step 5. Choosing Your New Font:
On the “Home” tab in the PowerPoint ribbon, find the “Font” dropdown menu. Click the arrow to see the list of available fonts. Scroll through the list and find the font you just installed. Click on the font name to apply it to your selected text.

Step 6. Formatting Options (Optional):
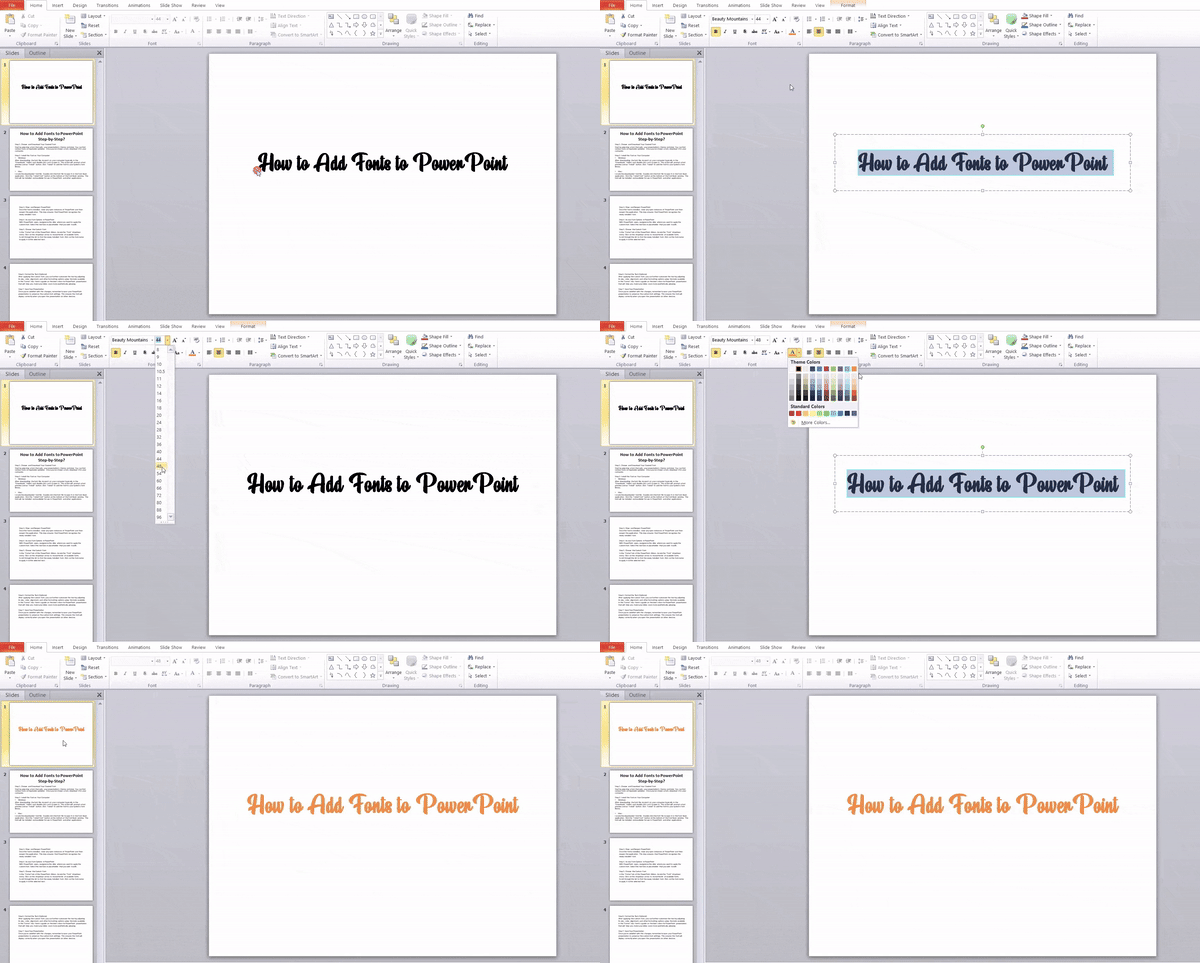
With the new font applied, you can further customize the text by adjusting its size, color, alignment, and other formatting options found on the “Home” tab.
Step 7. Saving Your Presentation:
Remember to save your presentation after making changes! This ensures the custom font settings are preserved and the font displays correctly when you open the presentation on other devices.

Closing Thoughts
Adding fonts to PowerPoint is an easy way to improve your presentations. Choosing fonts that work well with your message and the people you’re presenting to can make your slides clearer, set the right mood, and even help people remember your brand. With just a few steps and some thought about what fonts to use, you can add a creative touch and make your presentations even better.
<SlidesAICTA1 />
Frequently Asked Questions
Why isn’t my new font showing up in PowerPoint?
There are a few things to look at if your recently installed font isn’t showing up. First, check if it installed properly. Try using the font in another program, like Word. If it works there but not in PowerPoint, try restarting the program. Sometimes, a full computer restart might be needed to update the font list. Finally, make sure you’re not using an online version of PowerPoint, as these often don’t work with custom fonts on your device.
How do I uninstall a font if I don’t need it anymore?
Uninstalling fonts is easy, but the steps differ a bit between Windows and Mac.
- On Windows, find the “Fonts” option in the Control Panel. Right-click on the font you want to remove and select “Delete.”
- For Mac users, open the Font Book app. Right-click on the unwanted font and choose “Remove.”
Will embedding fonts make my presentation file size bigger?
Yes, embedding fonts increases the file size of your PowerPoint presentation. This happens because the font data itself gets included in the file.
What are some good fonts to use in PowerPoint presentations?
Choosing the right font for your presentation is important! Here are some popular and recommended options:
- Arial: This is a classic choice, offering a clean and professional look.
- Calibri: A modern and easy-to-read font, ideal for presentations.
- Verdana: This font excels for smaller text sizes, promoting readability.
- Roboto: A versatile and contemporary font that works well in various contexts.
- Open Sans: This friendly and neutral font creates a welcoming atmosphere.


