When you are trying to explain ideas visually, a concept map can make your presentation much easier to understand. Concept maps help you connect topics, subtopics, and relationships in a clear structure. They are useful for business presentations, training sessions, academic projects, and even personal planning. To create a concept map in PowerPoint, insert shapes or SmartArt, add your main concept, connect related ideas using lines or arrows, and structure them hierarchically or radially based on your map type. In this guide, you will learn how to create a concept map in PowerPoint.
What is a Concept Map?
A concept map is a visual way to organise information. It illustrates ideas, topics, and their connections to one another. Usually, the main concept sits in the centre or at the top, and related points branch out from it. This makes complex information easier to understand and remember.
There are 4 types of concept maps:
- Spider Map: A spider map starts with the main idea in the centre. Related ideas spread out around it like the legs of a spider.
- Flowchart Map: A flowchart map shows information in a step-by-step sequence. It uses arrows to connect each stage of a process.
- Hierarchical Map: A hierarchical map organises information from top to bottom. The most important concept sits at the top, followed by subtopics underneath.
- System Map: A system map illustrates the interactions between various components of a system. Instead of focusing on one direction, it highlights multiple connections.
Concept Map vs Mind Map in PowerPoint
| Feature | Concept Map | Mind Map |
| Structure | Networked, hierarchical (often tree-like), non-linear | Radial (central topic with branches radiating outwards) |
| Focus | Relationships between multiple concepts | One central idea or theme |
| Best For | Showing complex, detailed, and structured knowledge | Brainstorming, note-taking, and rapid ideation |
<SlidesAICTA1 />
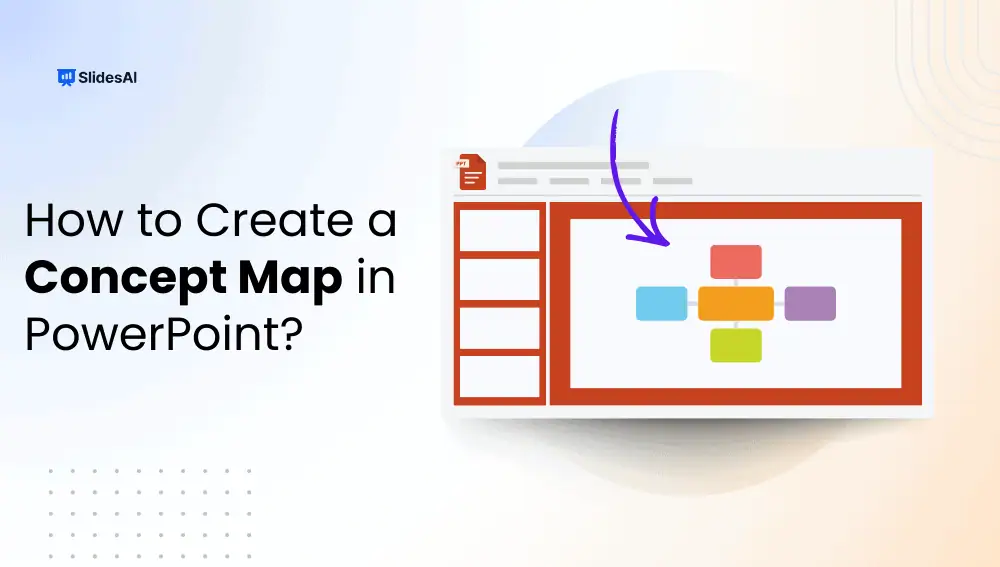
How to Create a Concept Map in PowerPoint? 2 Easy Methods
In PowerPoint, you can create concept maps in two main ways. One is by using Shapes for full control. The other option is to use SmartArt for faster layouts.
Method 1: Using Shapes
This method gives you complete flexibility. You decide the layout, connections, and structure based on your topic.
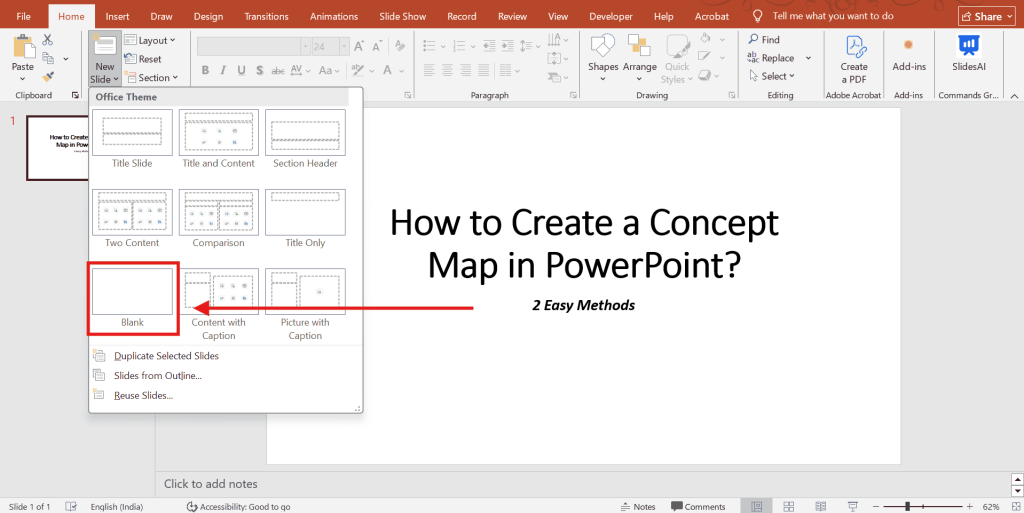
Step 1: Start with a Blank Slide
Go to the Home tab. Click on Layout and select Blank. This gives you an empty canvas to build your concept map without distractions.
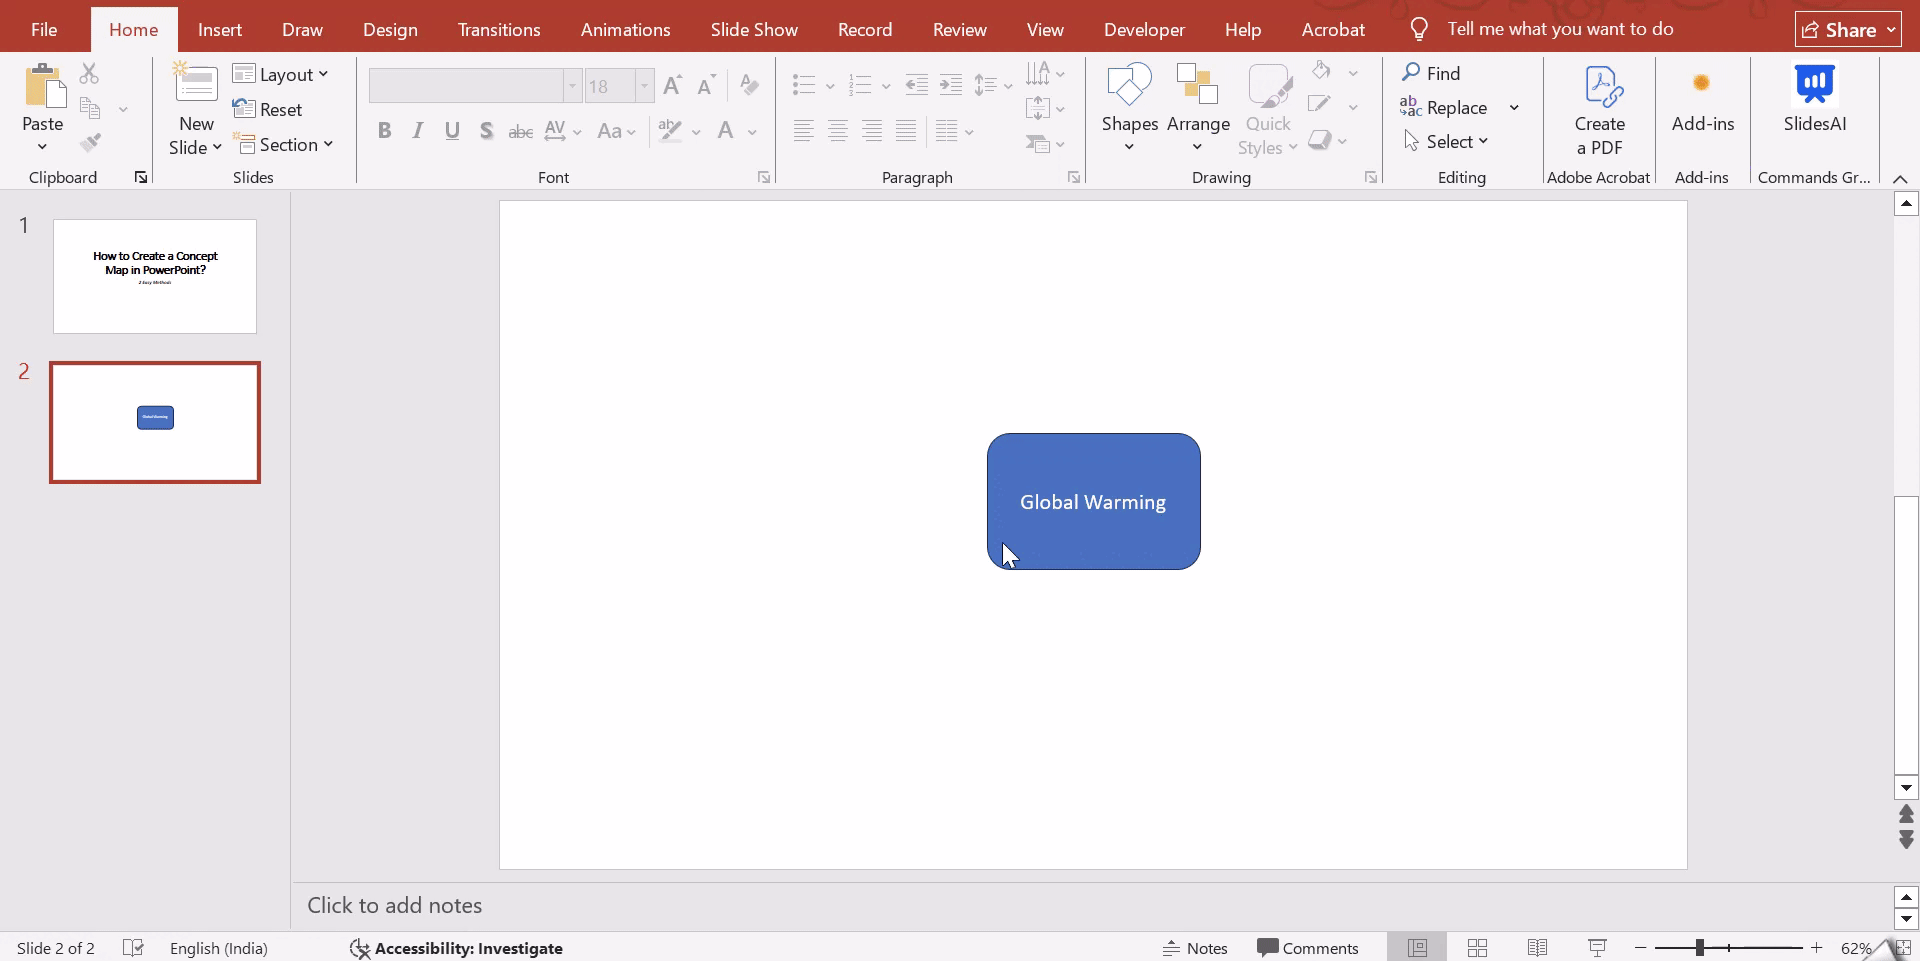
Step 2: Add the Main Concept
- Go to Insert, then Shapes.
- Choose an oval or a rectangle.
- Hold the Shift key while drawing to keep the shape proportionate.
- Place this shape at the center or top, depending on your map type.
- Double-click inside the shape and type your main idea.
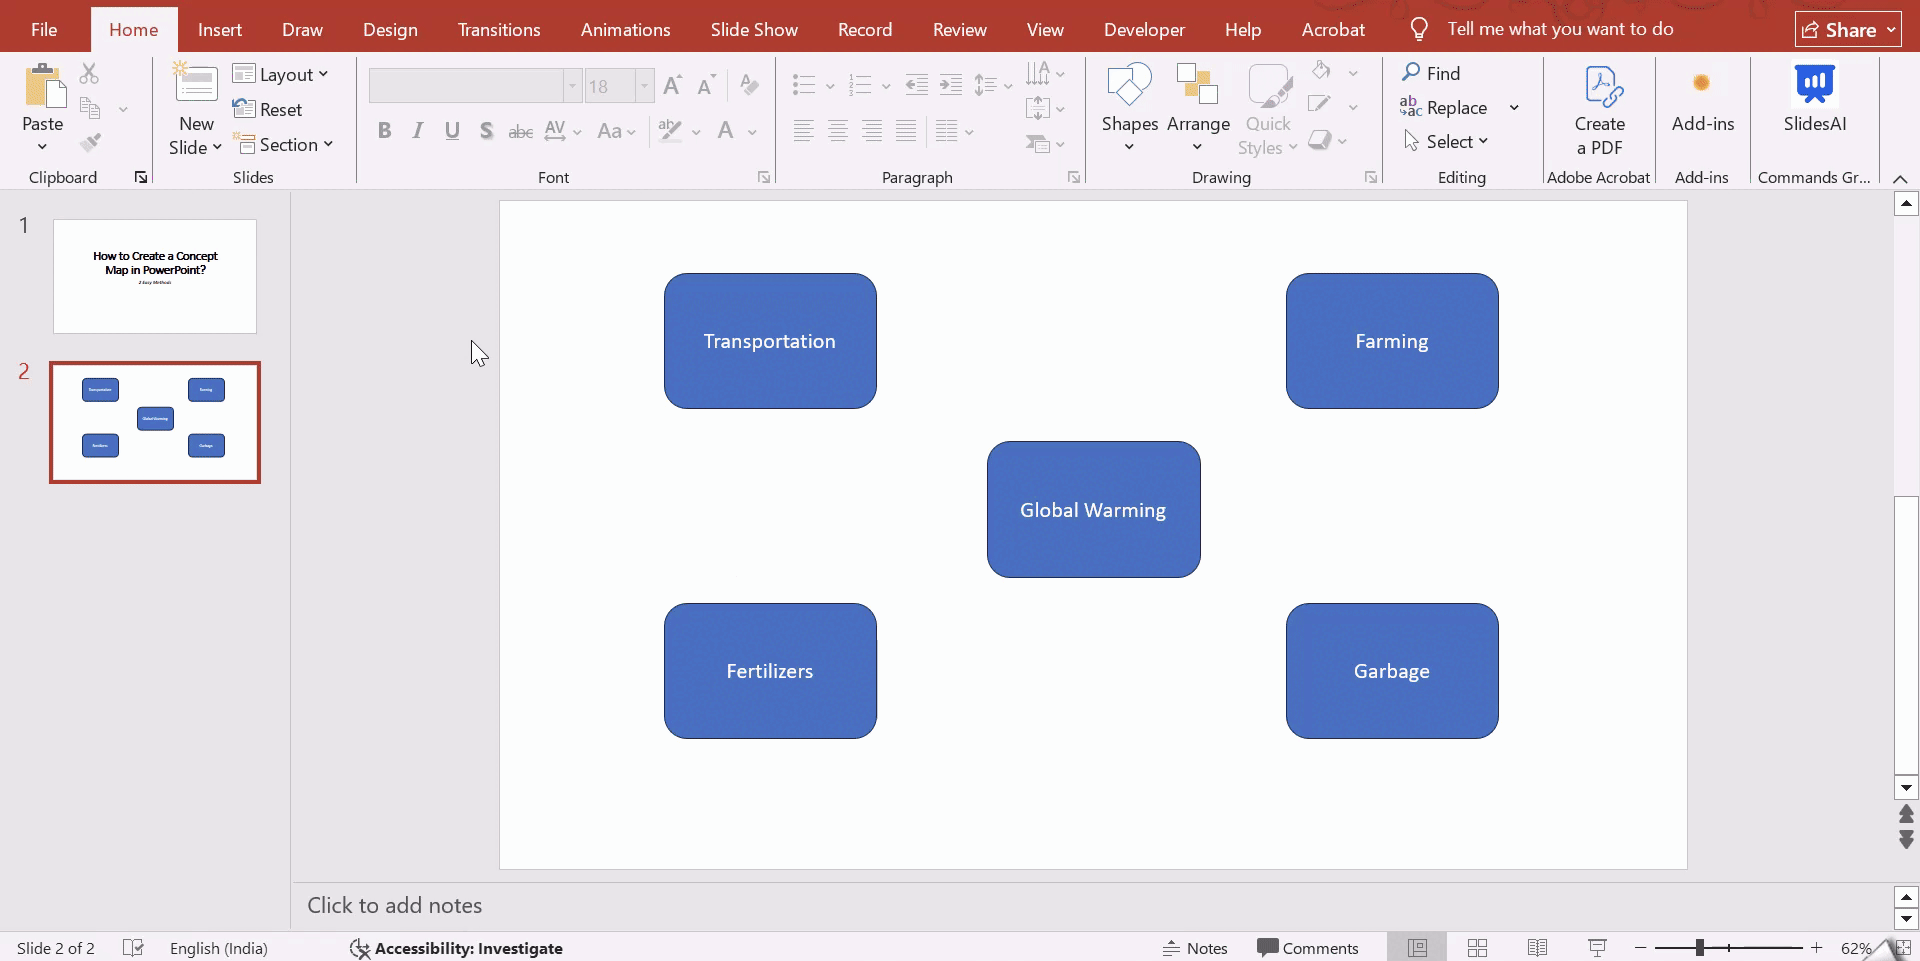
Step 3: Add Related Ideas
- Copy and paste the main shape to maintain size consistency.
- Place the new shapes around the central concept.
- Add your subtopics or related ideas inside each one.
- Keep spacing even so the map looks clean.
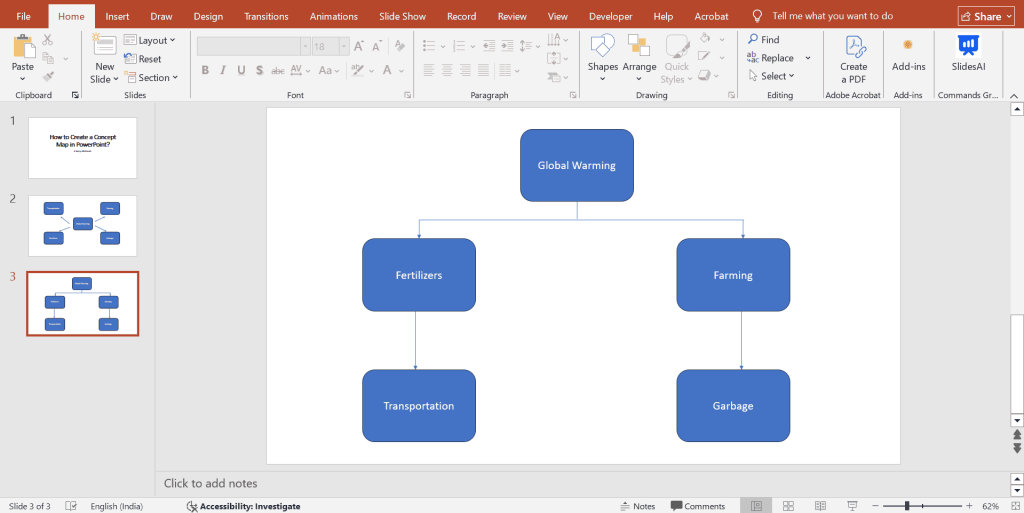
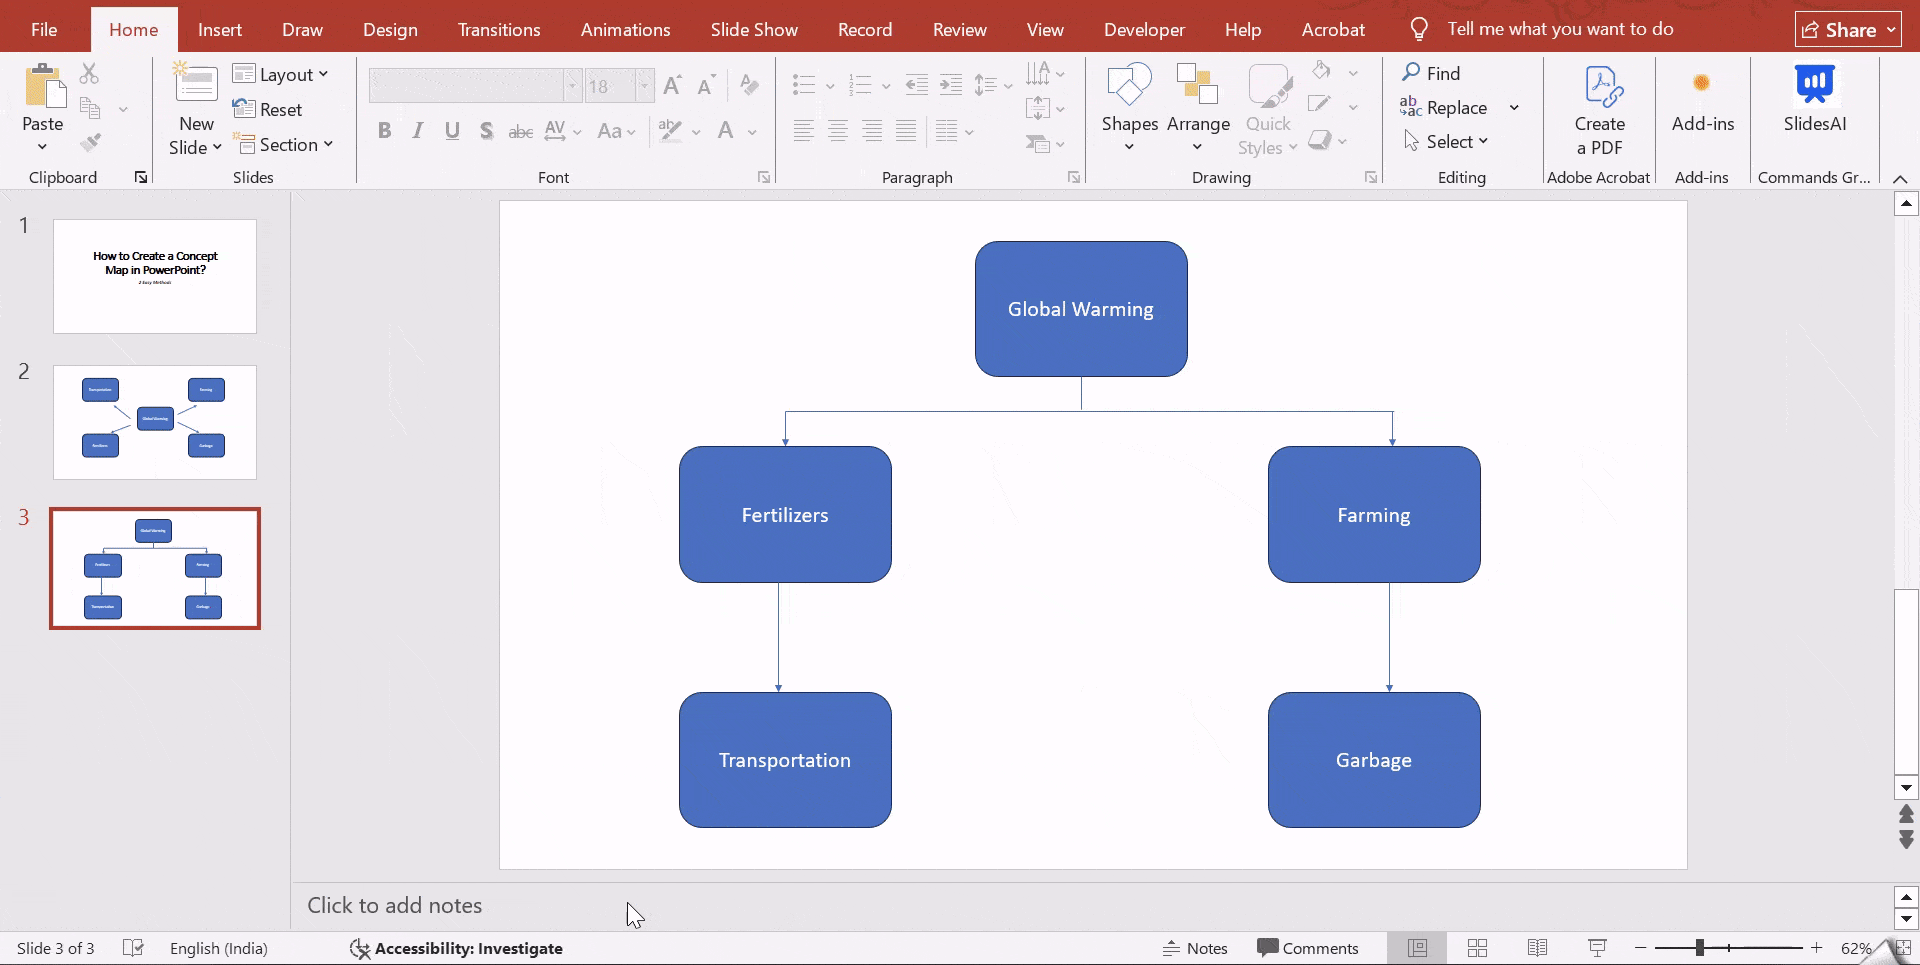
Step 4: Connect with Lines
- Go to Insert, then Shapes, and select Lines or Arrows.
- Draw connectors from the main concept to each related idea.
If needed, double-click the line to type linking phrases such as “leads to” or “includes.” This helps explain relationships between ideas.
Step 5: Arrange the Layout Based on Concept Map Type
Now structure your shapes based on the map format you want:
- Spider Map: Keep the main concept in the center. Place related ideas around it like branches.
- Flowchart Map: Arrange shapes in a sequence from top to bottom or left to right.
- Hierarchical Map: Put the main concept at the top and subtopics below in levels.
- System Map: Place elements in a circular or network layout to show interconnections.
Step 6: Style the Map
Use Shape Fill to add colors. Use Shape Outline to adjust borders. You can also explore Format options to apply theme colors, shadows, or effects. Styling improves readability and visual appeal.
Method 2: Using SmartArt
If you want a quicker method, SmartArt is the better option. It provides ready-made structures that you can customise.
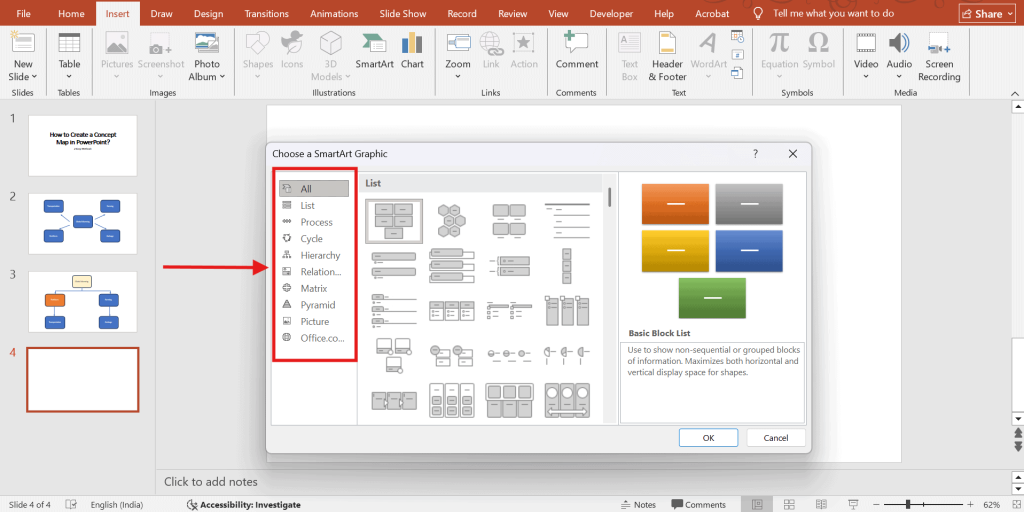
Step 1: Insert SmartArt
Go to Insert and click SmartArt. A pop-up window will appear with different diagram categories.
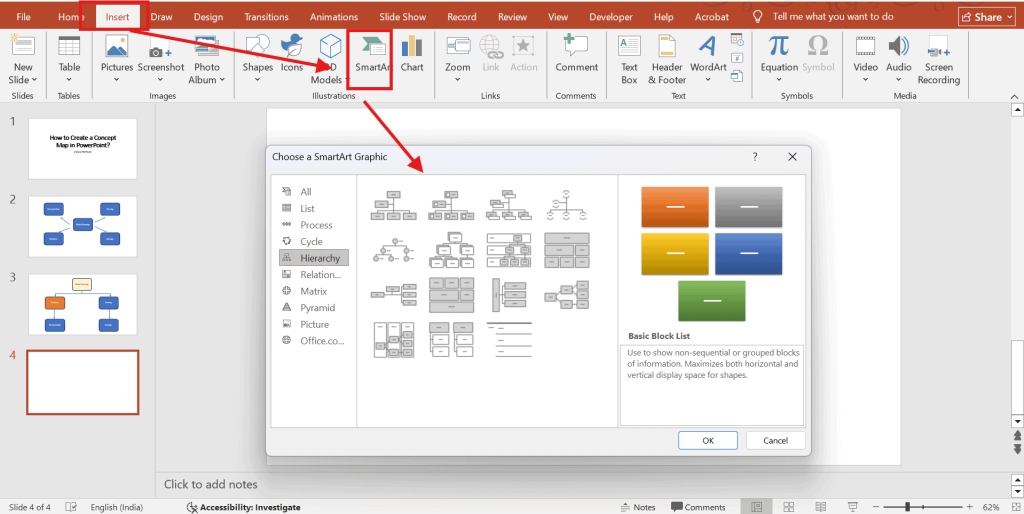
Step 2: Choose a Layout
Pick a structure that fits your concept map:
- For a Spider Map, choose Relationship layouts like Diverging Radial.
- For a Flowchart Map, select Process layouts.
- For a Hierarchical Map, choose Hierarchy layouts.
- For a System Map, Process, or Relationship layouts work well.
Click OK once you select your layout.
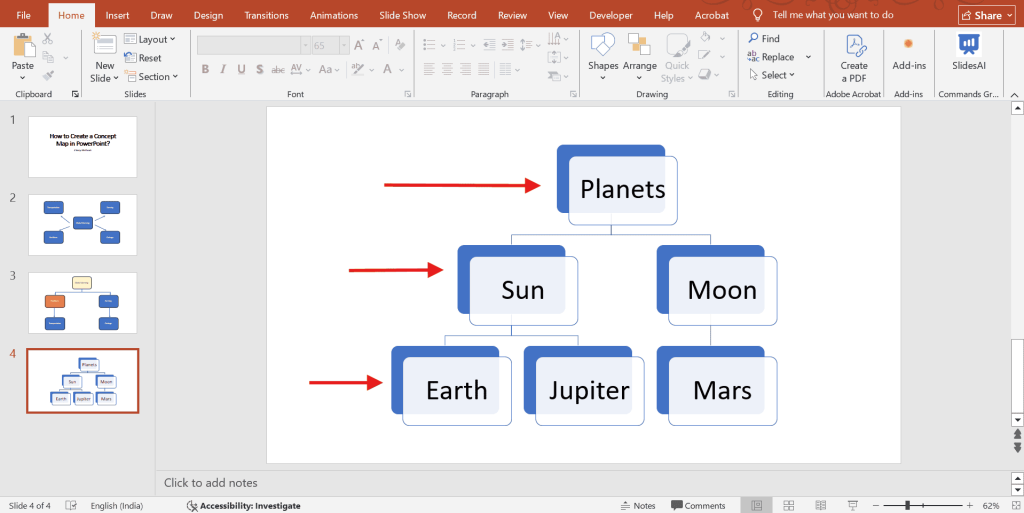
Step 3: Edit Text
- You will see a text pane on the left side.
- Type your main concept and subtopics here.
- Press Enter to add more nodes.
- Use Tab to create sublevels and Shift plus Tab to move levels up.
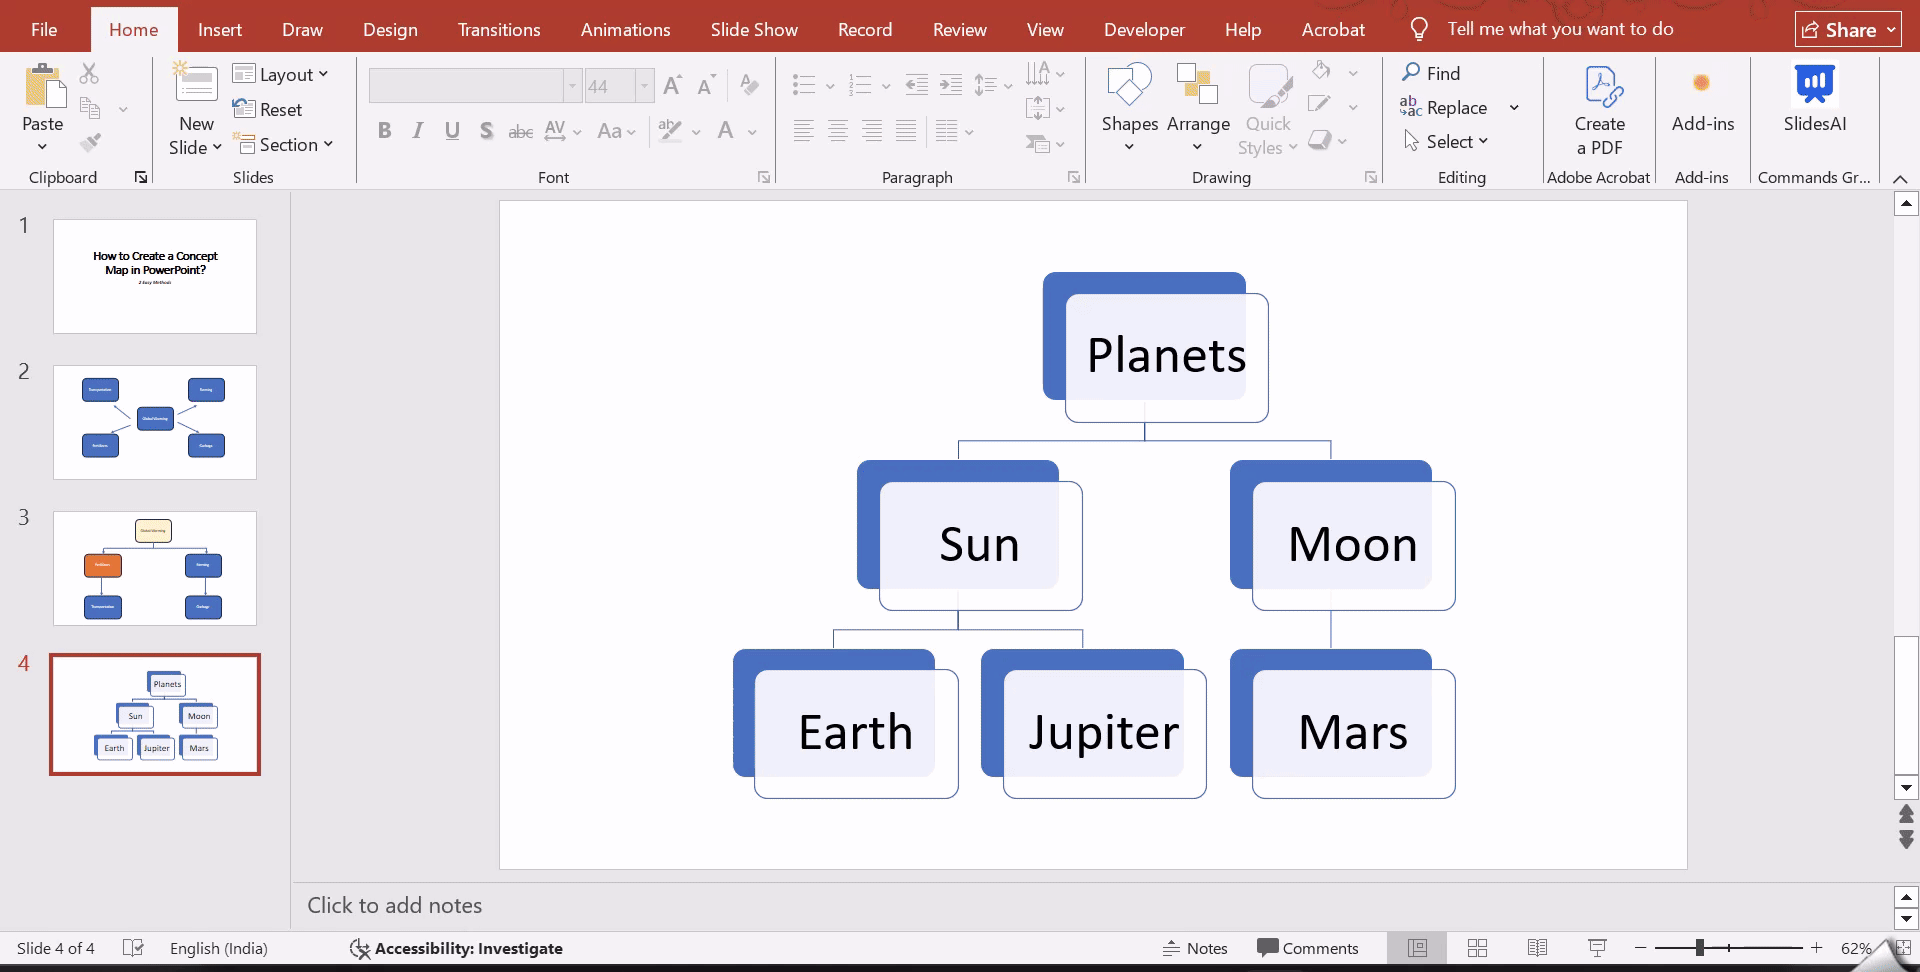
Step 4: Customise the Design
- Use the SmartArt Design tab to change layouts and color schemes.
- Go to the Format tab to adjust fonts, shapes, and sizes.
You can modify the look without changing the structure.
<SlidesAICTA2 />
Also Read – How to Create a Mind Map in PowerPoint?
Common Use Cases Where Concept Maps Are Useful
1. Education
- Break down difficult topics into smaller, understandable parts
- Support active participation and deeper engagement in learning
- Encourage teamwork and shared idea building
- Assist in structuring lesson plans clearly
- Help students prepare and revise for exams
2. Business
- Support long-term strategic planning
- Organise and track project workflows
- Generate and structure brainstorming ideas
- Improve and streamline business processes
- Support planning and growth in business development
3. Personal Projects
- Organise thoughts and personal ideas
- Boost creative thinking and idea flow
- Manage daily or long-term tasks
- Work through challenges and find solutions
4. Research
- Plan early-stage research direction
- Identify gaps in existing knowledge
- Build structured research frameworks
- Map connections between studies and theories
- Simplify complex data analysis
Also Read – How to Create an Org Chart in PowerPoint: Steps + Template
Best Practices for Creating an Effective Concept Map
Here are some simple best practices to follow when building a clear and useful concept map.
- Define the Central Concept Clearly: Start by deciding the main idea or question your concept map focuses on. Place it at the center or top so everything else connects back to it.
- Keep the Scope Balanced: Make sure the main idea is focused enough to go deep but broad enough to include all related points. This keeps the map clear and easy to follow.
- List and Select Key Concepts First: Before creating the map, write down all related ideas. This makes it easier to plan the layout and avoid overcrowding later.
- Arrange Concepts Hierarchically: Organize ideas from general to specific. Keep broader concepts closer to the main idea and place detailed points further out.
- Use Clear Connecting Words: Label the lines between concepts with short phrases like “includes,” “leads to,” or “depends on.” These words explain how ideas are related.
- Maintain Visual Consistency: Use the same shapes, colours, and fonts for similar ideas. This makes the concept map easier to read and understand.
- Avoid Overcrowding the Slide: Do not try to fit everything on one slide. Focus on the most important connections and split into multiple slides if needed.
Also Read – How to Create a Flow Chart in PowerPoint?
How SlidesAI Helps You Create an Engaging Concept Map?
SlidesAI makes concept map creation easier by cutting down manual design work and speeding up slide creation. Instead of starting from scratch, you can begin with ready-made visual templates.
SlidesAI turns raw ideas, outlines, or text prompts into structured slides that can be adapted into concept maps. Its AI-assisted layouts help maintain hierarchy, spacing, and readability, which are essential for clear concept maps. Once the slide is generated, you can customise shapes, connectors, and labels directly in PowerPoint.
Templates You Can Use to Create Concept Maps
<SlidesAICTA3 />
Also Read – How to Create a Gantt Chart in PowerPoint?
Frequently Asked Questions About Concept Maps in PPT
1. Does PowerPoint have templates for concept mapping?
PowerPoint does not have ready-made concept map templates. However, you can use SmartArt Graphics and shapes to build one. You may need to adjust layouts and connectors to fit your concept structure.
2. Can I collaborate on a concept map in PowerPoint?
Yes, you can share the PowerPoint file and work on it together. Multiple users can edit the file if it is stored on OneDrive or SharePoint. Real-time collaboration is available, but not as smoothly as dedicated mapping tools.
3. Is SmartArt good for concept maps?
SmartArt works well for basic concept maps. It is useful when you want a clean and structured layout quickly. Complex maps, shapes, and connectors offer more flexibility.
4. Can I convert a mind map into a concept map in PowerPoint?
Yes, you can convert it by rearranging the structure. Add cross-links, insert connectors between ideas, and label relationships. This helps shift the focus from brainstorming to conceptual understanding.
5. Can I animate a concept map in PowerPoint?
Yes, animations can be applied to shapes and connectors. This allows you to present ideas step by step. It also helps viewers focus on one concept at a time.
6. How many concepts should be on one PowerPoint slide?
Try to keep between 6 and 10 concepts on a single slide. This keeps the layout clean and easy to read. Too many elements can make the map look cluttered.
Related Posts
-
A mind map is a simple way to show ideas and how they connect. You…
-

{ “@context”: “https://schema.org/”, “@type”: “BreadcrumbList”, “itemListElement”: [{ “@type”: “ListItem”, “position”: 1, “name”: “Home”, “item”: “https://www.slidesai.io”…
-

Ever feel like your PowerPoint presentations could benefit from a strong start? Using an agenda…
-

{ “@context”: “https://schema.org”, “@type”: “BlogPosting”, “mainEntityOfPage”: { “@type”: “WebPage”, “@id”: “https://www.slidesai.io/blog/powerpoint-comparison-slide” }, “headline”: “4 Ways…
-

A storyboard presentation is a visual, step-by-step plan for a presentation, project, or video.